Along with the work on Leda’s deck and cabin, her mast needed to be addressed. She still had her original spruce spar when we bought her and she still does. Somewhat modified when we bought her and even more modified now.
She was originally launched with a 70-foot mast as a fractional rig. Where her forestay attached were a set of jumper struts to act essentially as a third set of spreaders. All of her spreaders where made of galvanized steel. Flat plate had been formed to wrap around the mast with the spreaders or struts welded to it with gussets for support. Tangs were part of the flat plate which was cut such that they extended above or below as needed and then they were doubled in thickness by welding.
The formed flat plate was drilled and countersunk to accept flat head wood screws. It had all been hot-dipped galvanized. In addition to being fastened to the mast with wood screws, there were bolts that passed through the mast perpendicular to the keel to pull it in tight to the wood.
Her mast was constructed using a four sided box construction with full length gussets glued into the inside corners so that the hollow of the mast was an octagon. All pieces had been scarfed or step-scarfed and glued to achieve the length needed. The drawing below shows the cross section of the construction. It is not intended to be drawn to scale. The mast tapers to both ends but is about 8 X 13-inches at the largest section. Maximum thickness of each plank is about two inches.
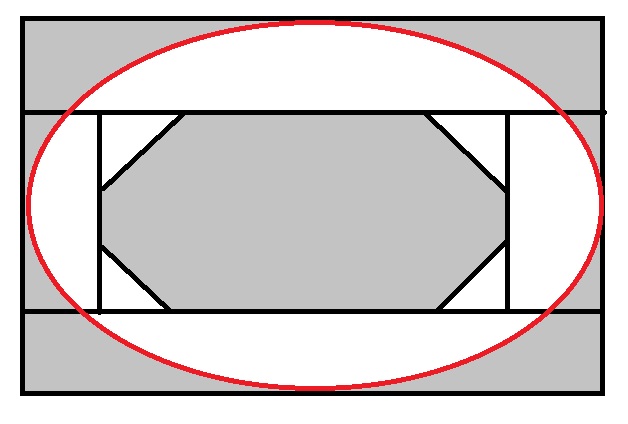
The cross section would have been rectangular when first glued up. It was then planed to the oval seen above. The grey areas are the hollow in the center, and the removed wood. The red outline is the finished shape of the mast. When the mast was originally built, posts were sunk into the ground at regular intervals. A strongback was built across the tops of these posts, so that the working height was about at the waist. The strongback was trued to be straight and flat. This was the gluing bench. The taper in the mast would have been calculated and blocking provided to the trued surface to compensate.
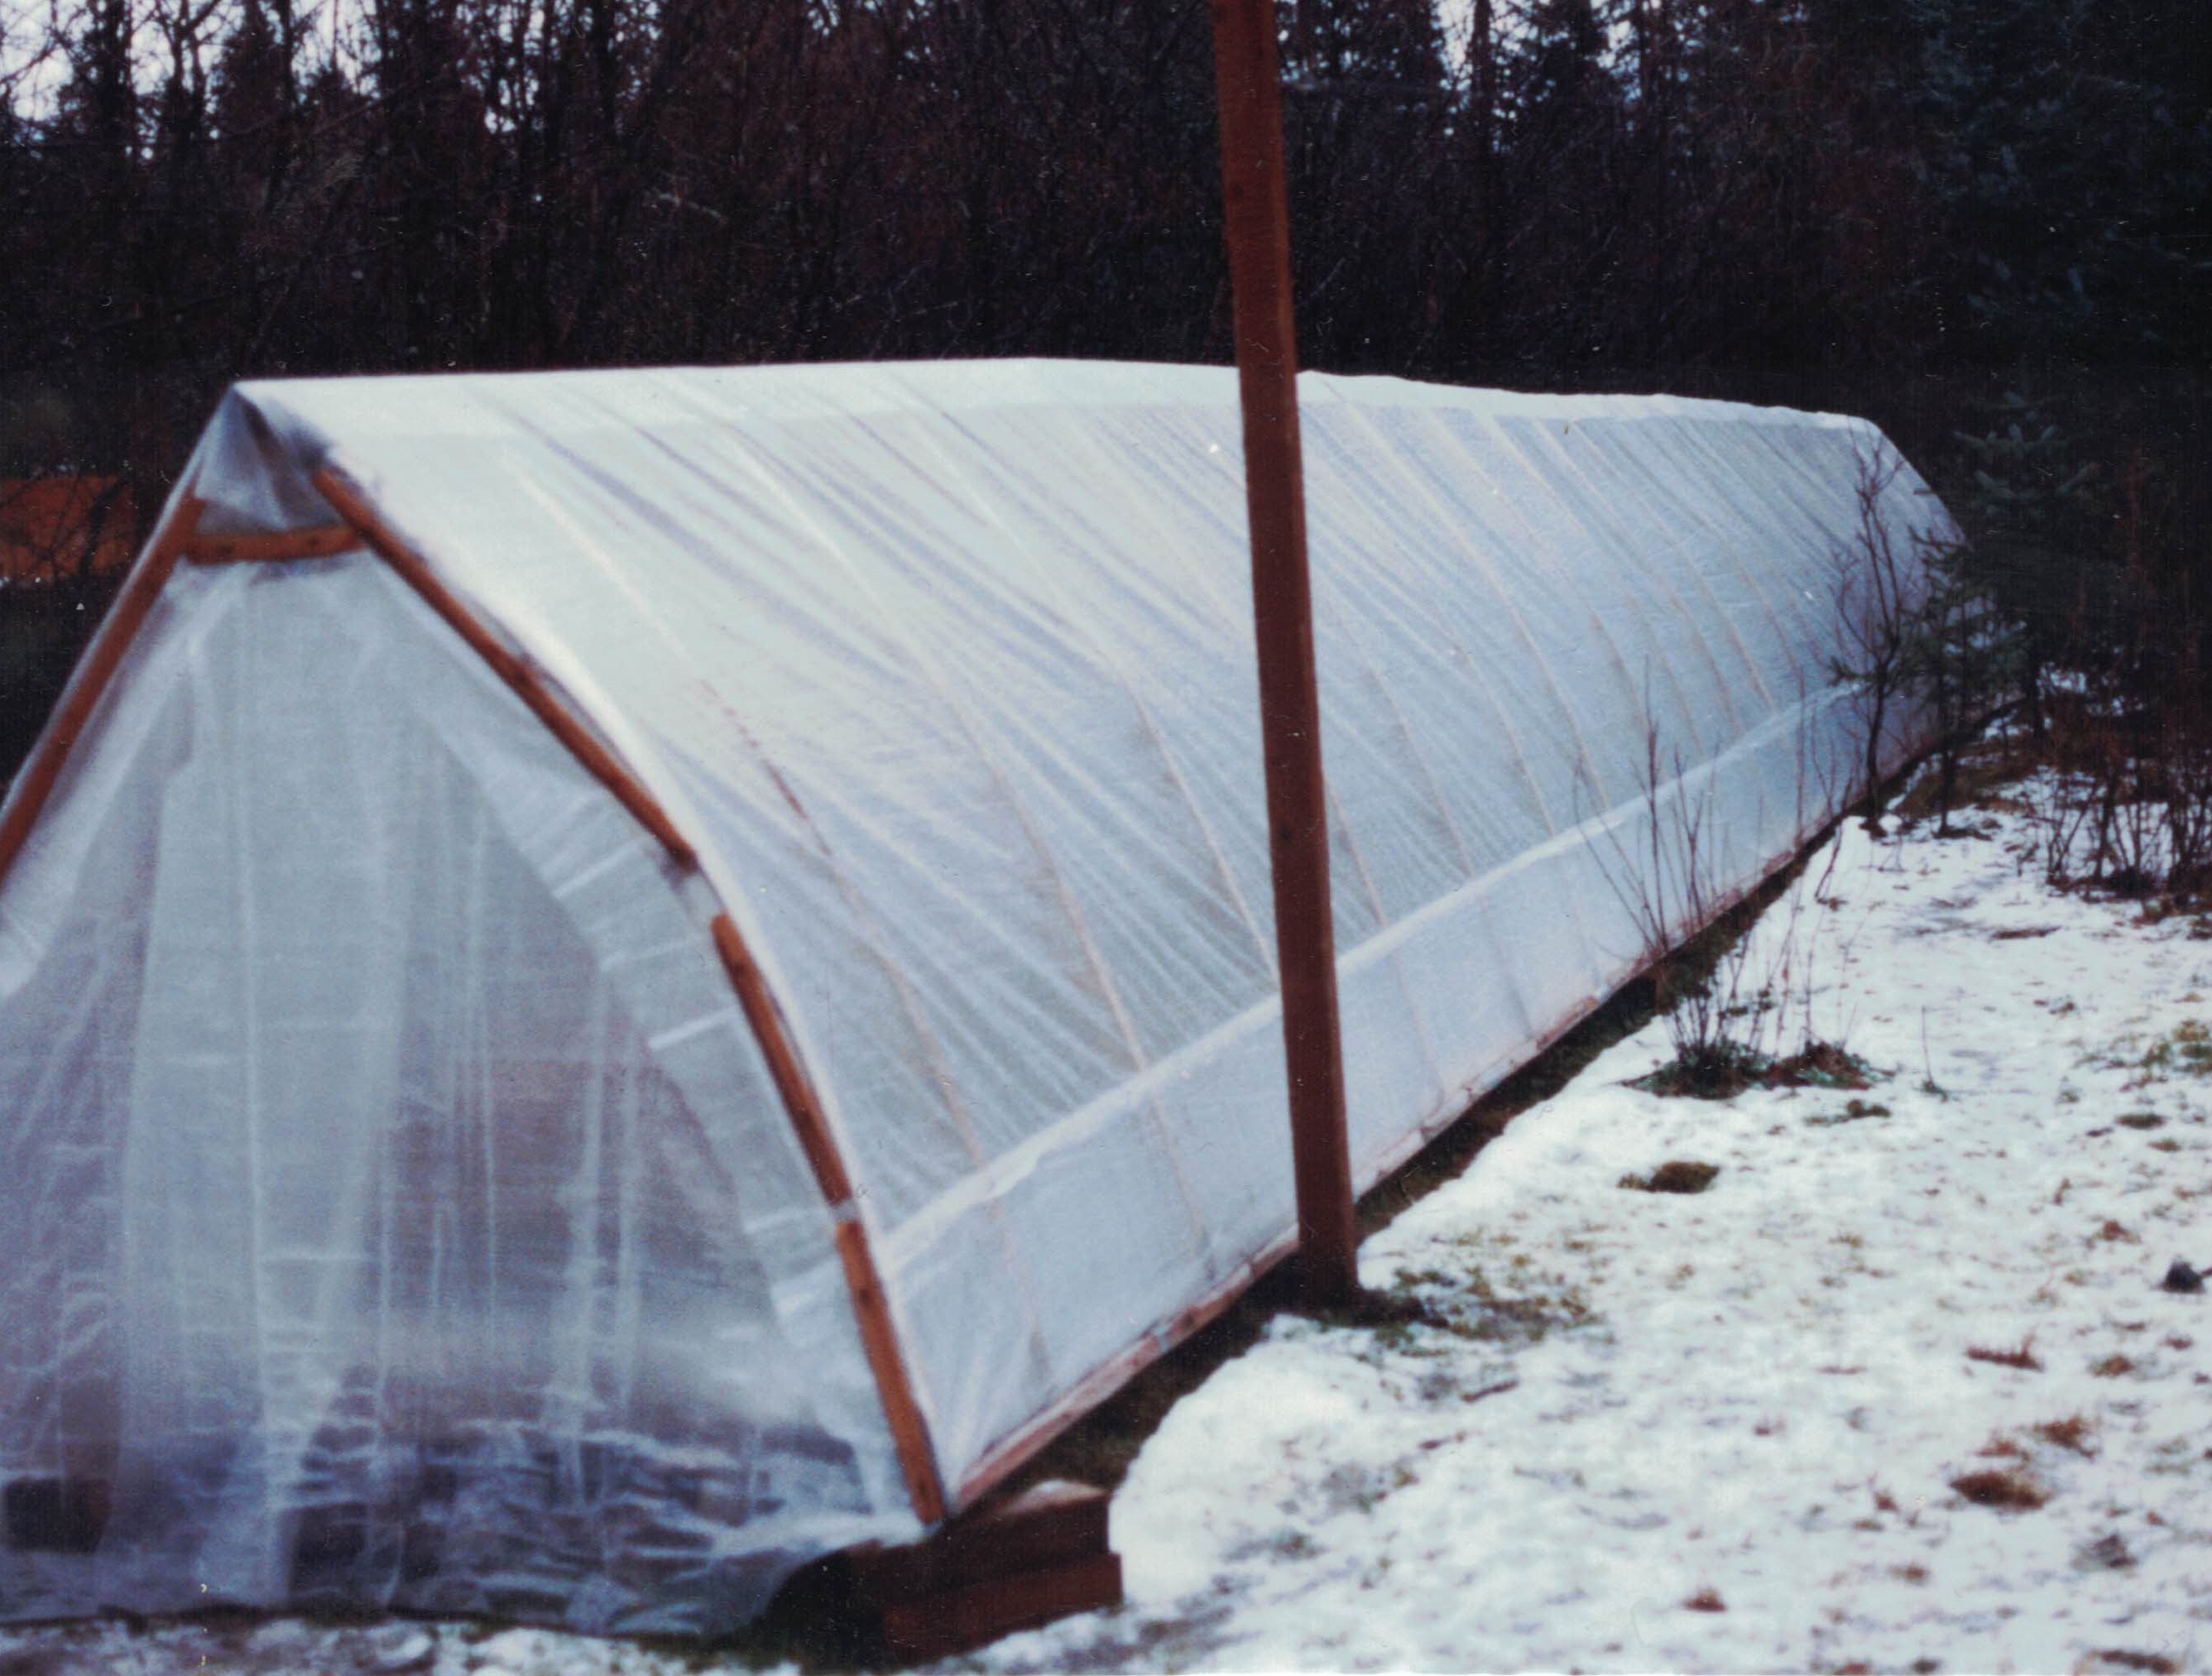
When we found Leda in Seattle her mast had been painted white. Her sail track was pulling off and some of the seams where starting to open up. As previously mentioned the mast had been shortened to 61-feet by cutting the top 9-feet off. This turned the location of the original jumper struts into the truck. The struts were cut off and a strap of steel fashioned to go over the top of the mast for the fore and after stays to attach to. Eye bolts were added to provide for halyard blocks and a slot was cut in the mast to accommodate a sheave for the main halyard.
When we hauled Leda in the autumn of ’91, her mast was pulled. Someone told me somewhere along the way that old masts often fall apart when the tension comes off. Whether I was told this before or after removing the mast I don’t recall but it was proved to be correct. But more on that to follow.
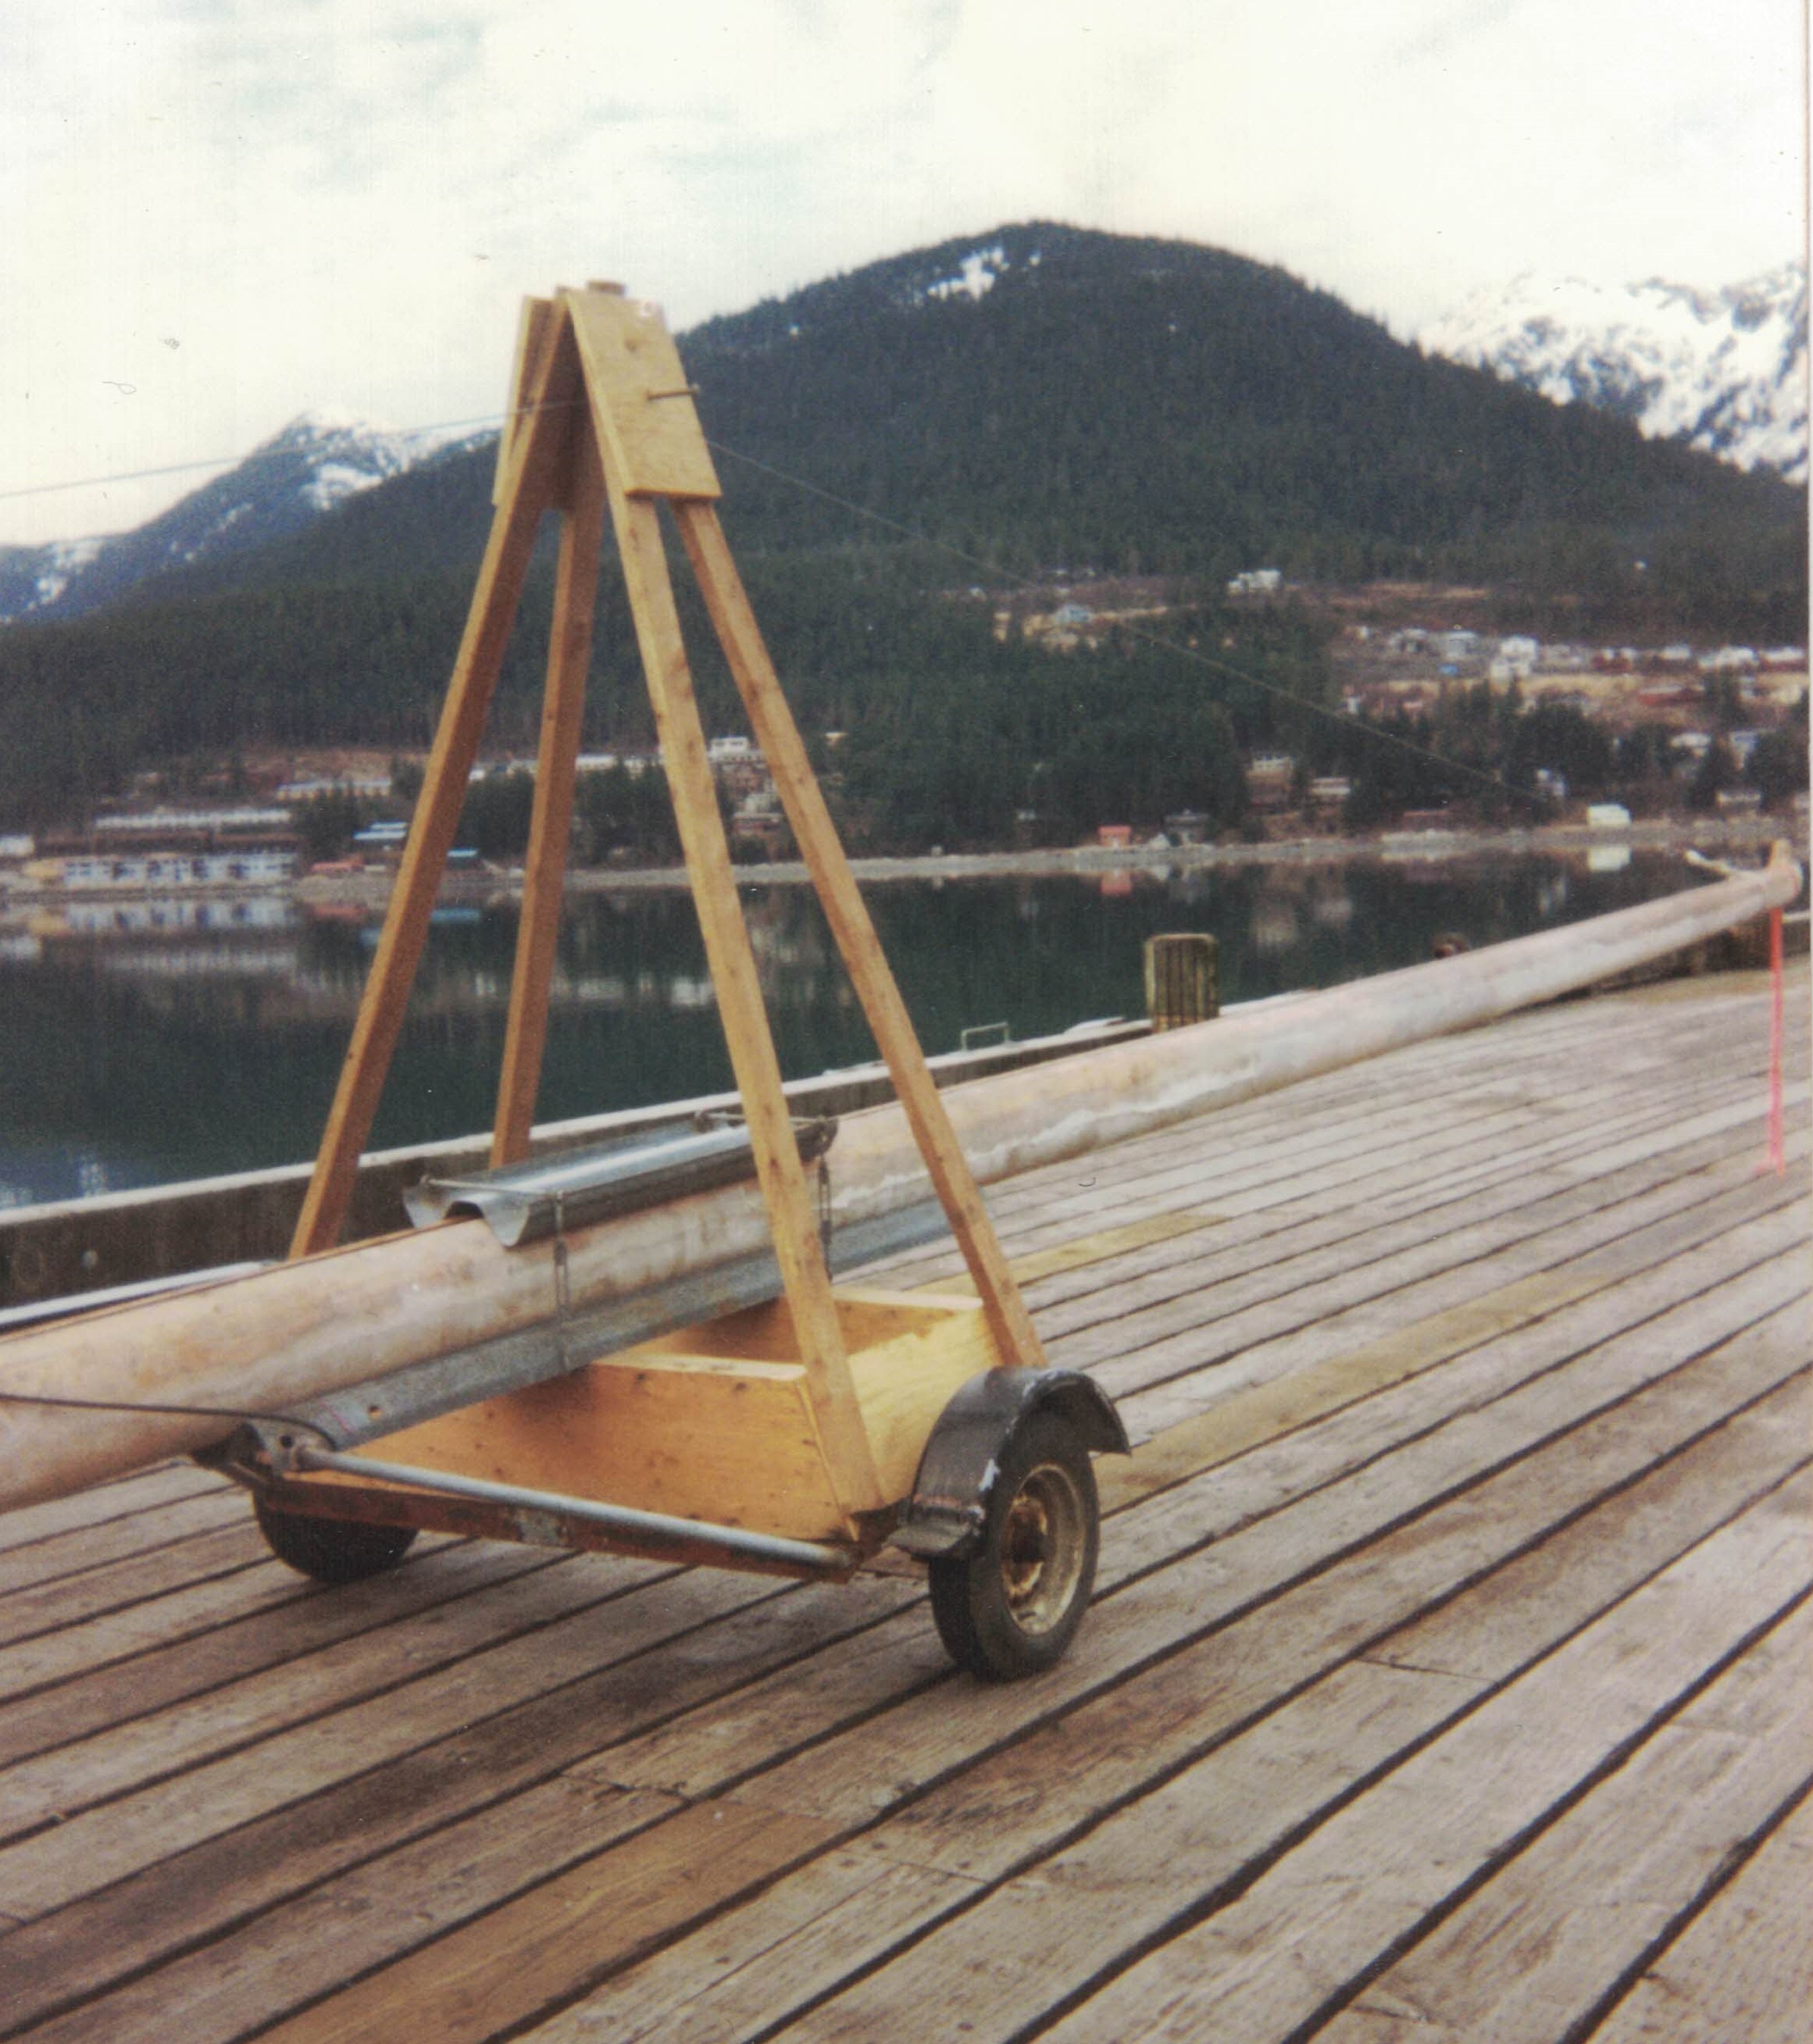
When we moved Leda to the harbor and covered her, we had to get our mast out of the construction yard in which it was laying. A friend offered their back yard for the project and we took them up on it. The mast had to be moved from downtown Juneau to a neighborhood near the Mendenhall Glacier. Some twelve miles or so. It was placed on a 40-foot flatbed to haul it and I bought a keg of beer for a softball team in payment for showing up after practice to carry the mast to the needed location. It’s funny, had I offered them all five dollars each they would have scoffed, but the offer to buy a keg of beer produced the entire team.

The above photo isn’t a very good one. But I always get a laugh out of the lead guy trying to steer from the front. They were an enthusiastic bunch but not real good on following direction. The mast weighs about six hundred pounds, so each individual guy is only carrying about 30 pounds, however the group in the front complained that it was heavy. Well it would have been with their buddy hanging off the end, trying to twist the mast around the corner of the house!
The mast was laid on a long bed of pallets and blocking. The spreaders and other hardware were removed and a structure was built over it to protect it from the weather.
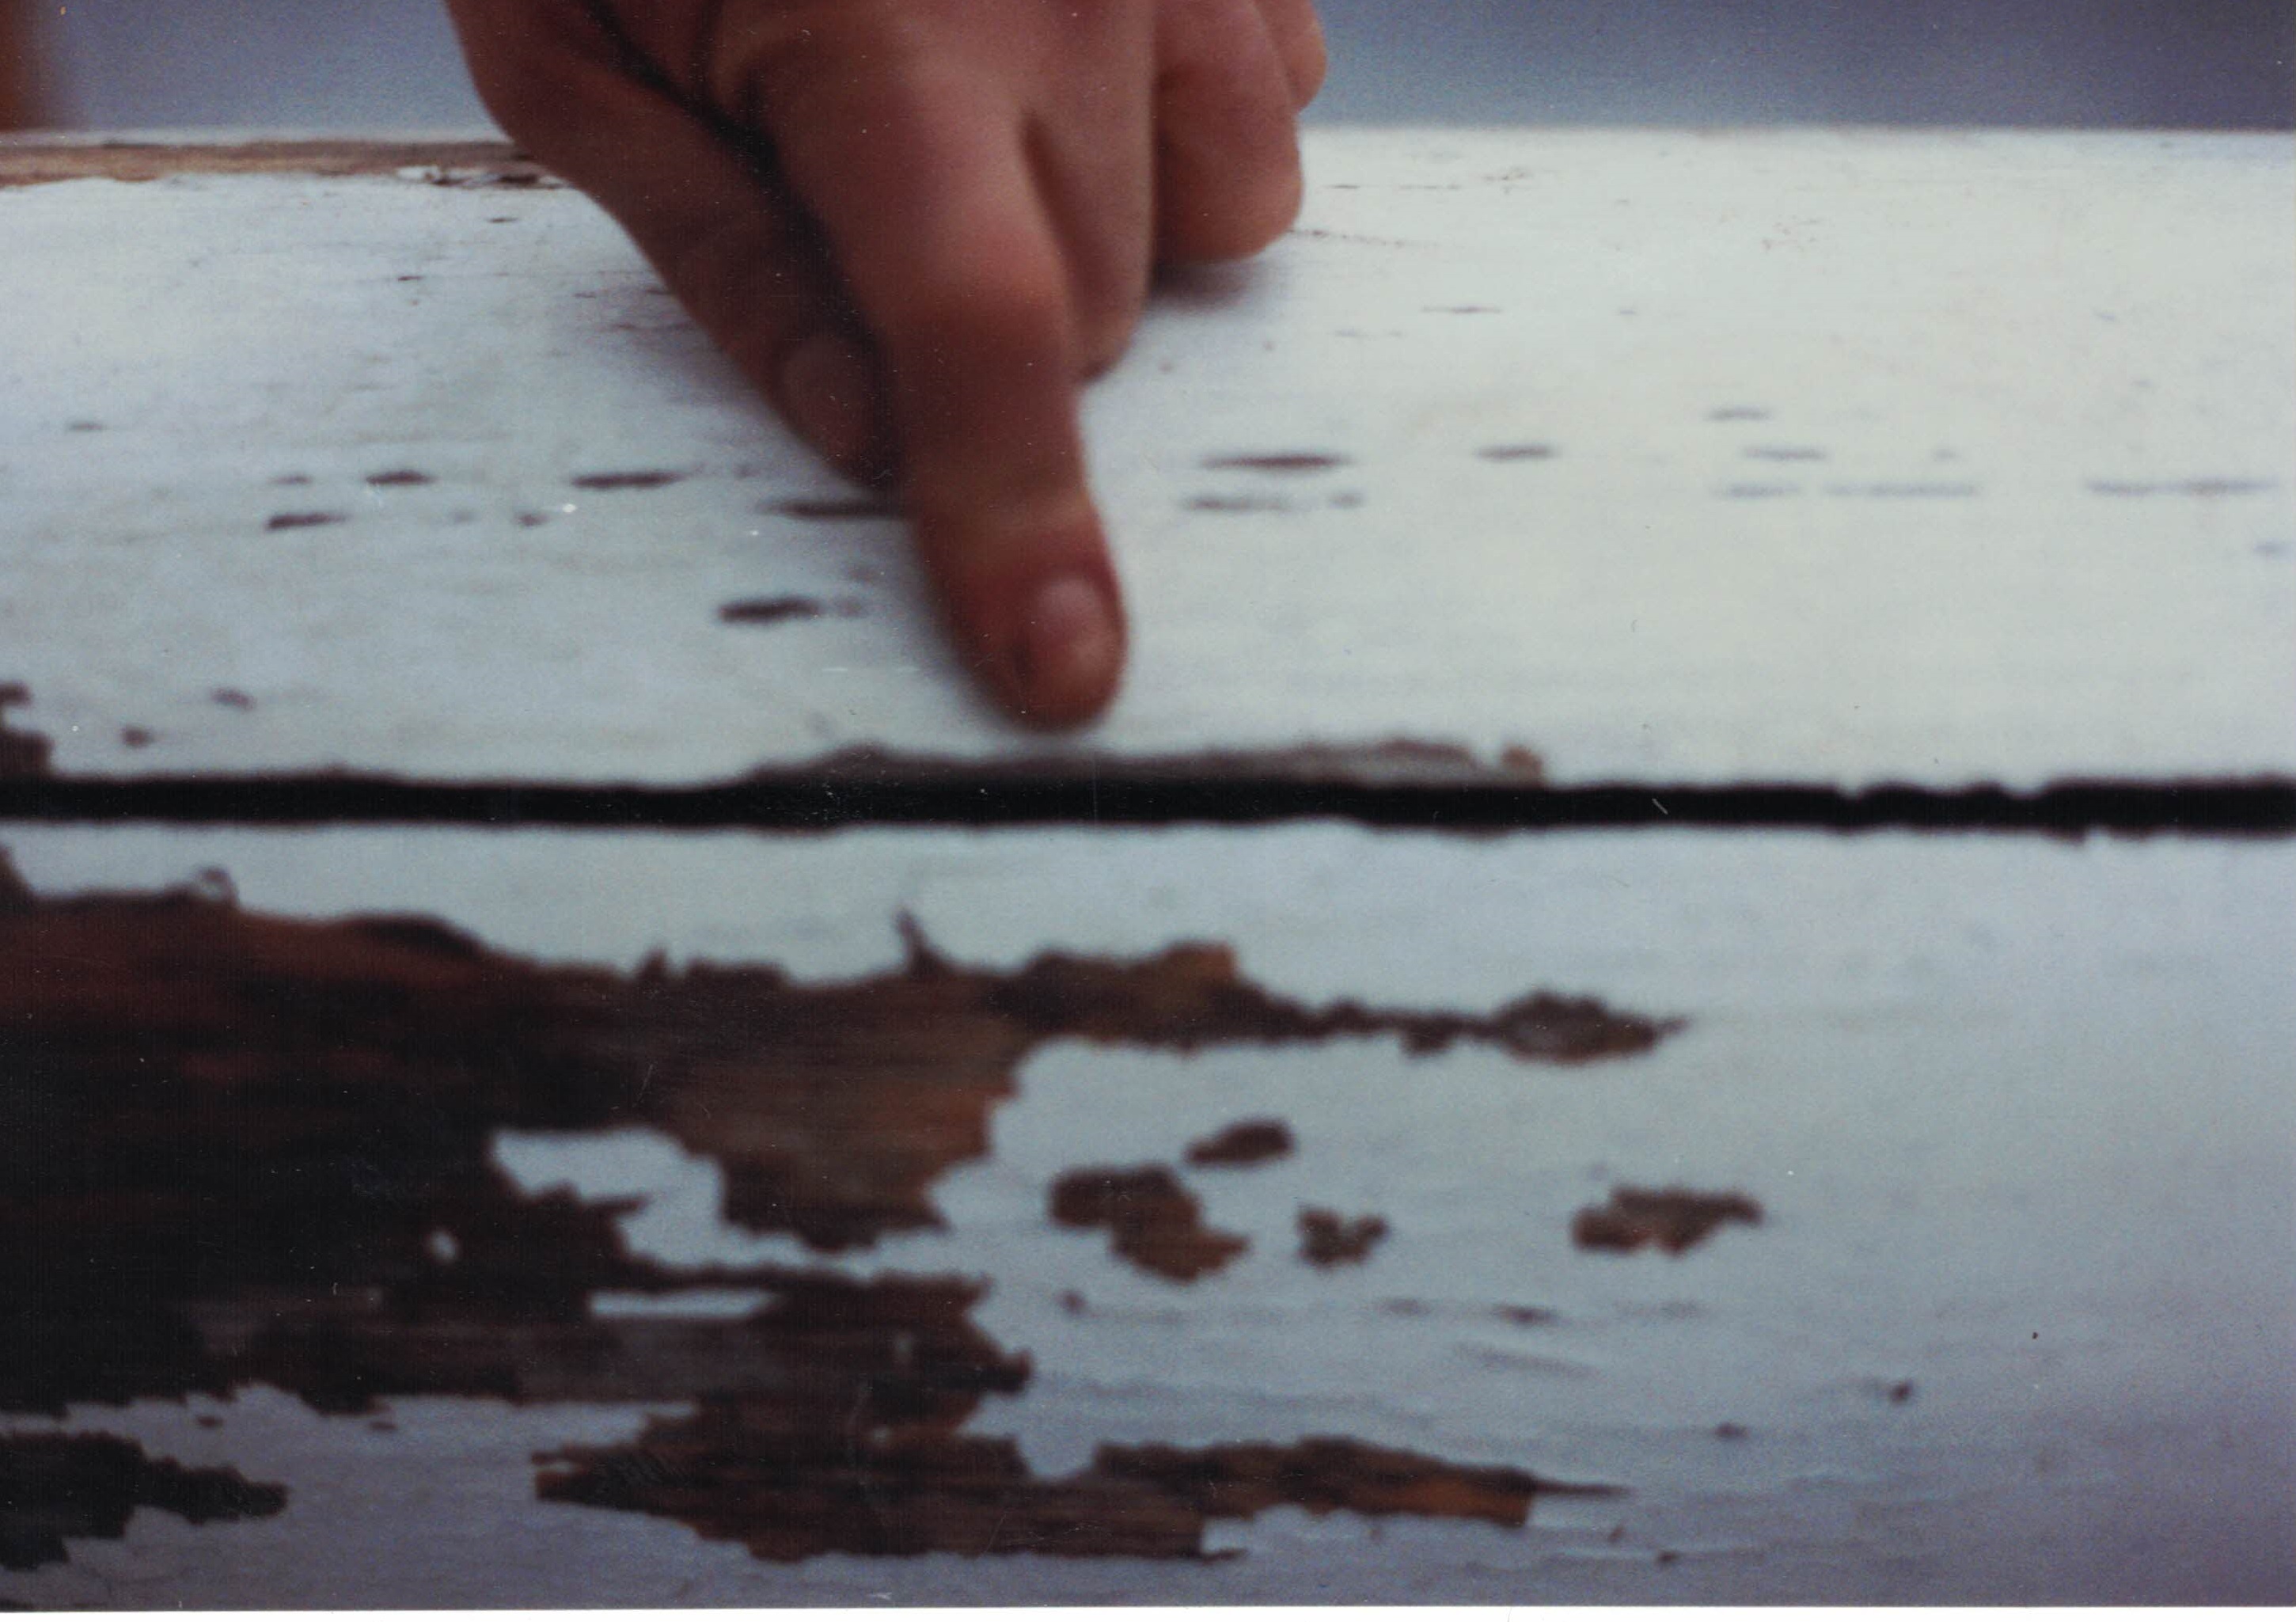
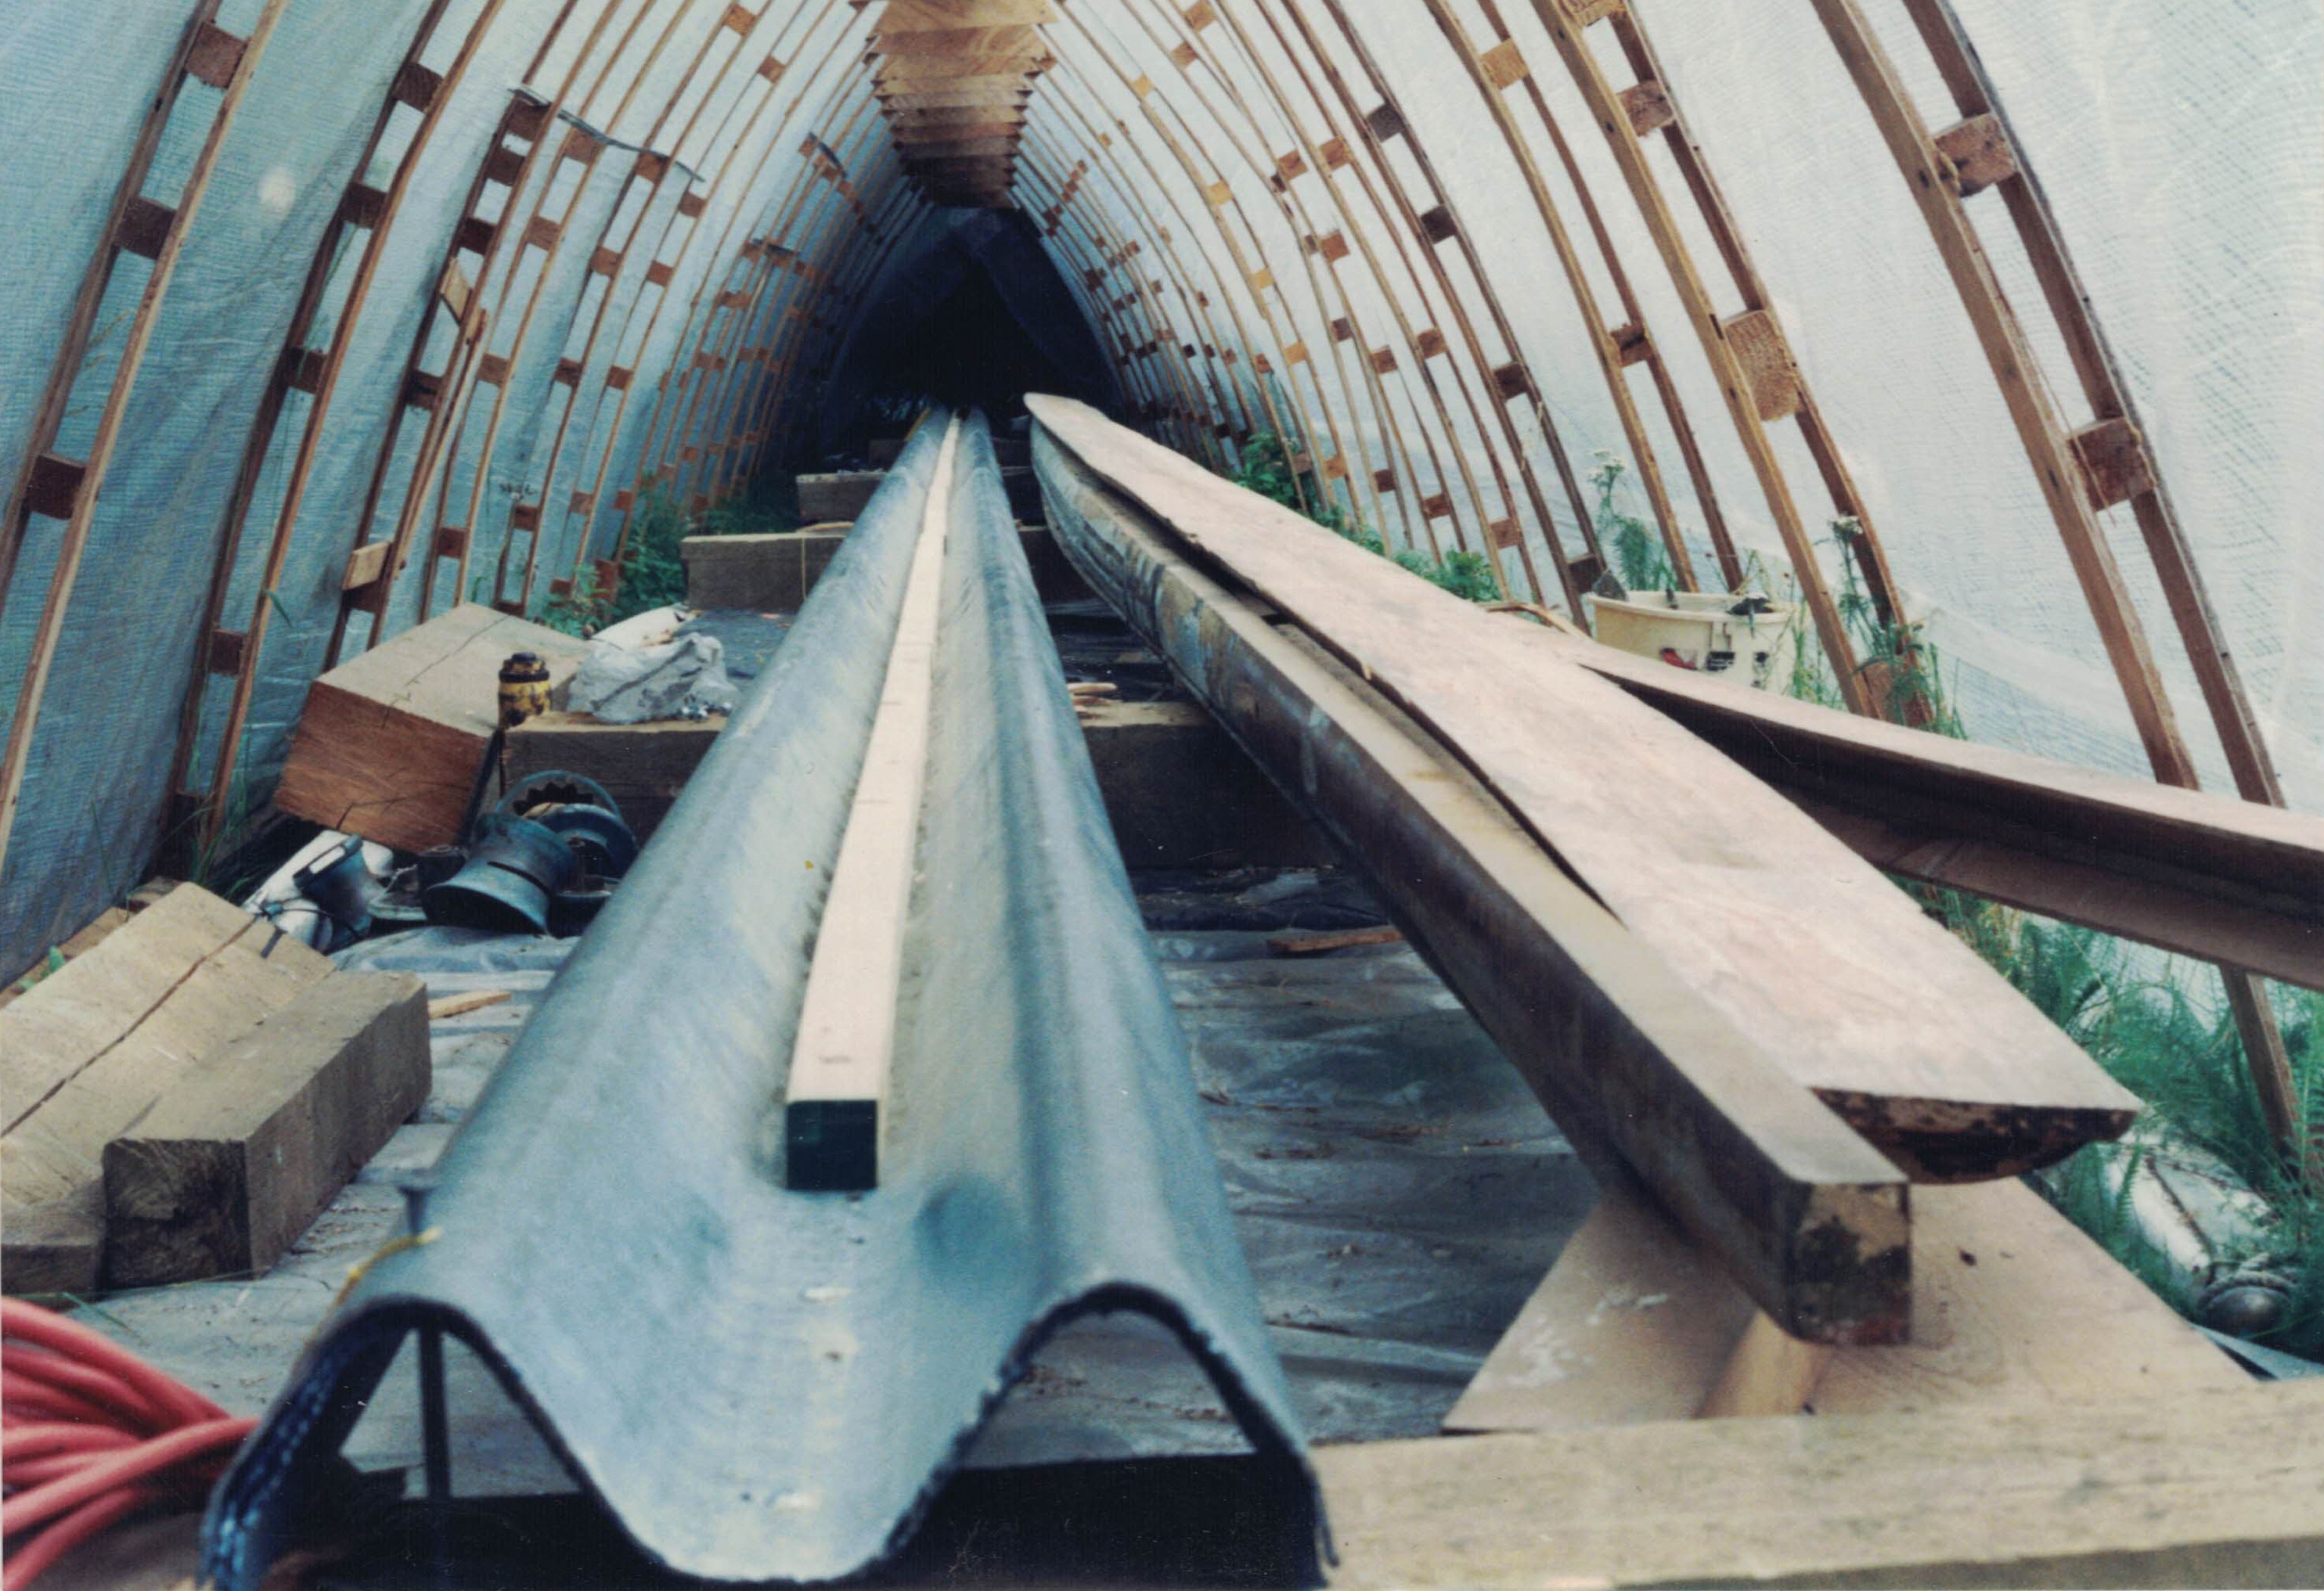
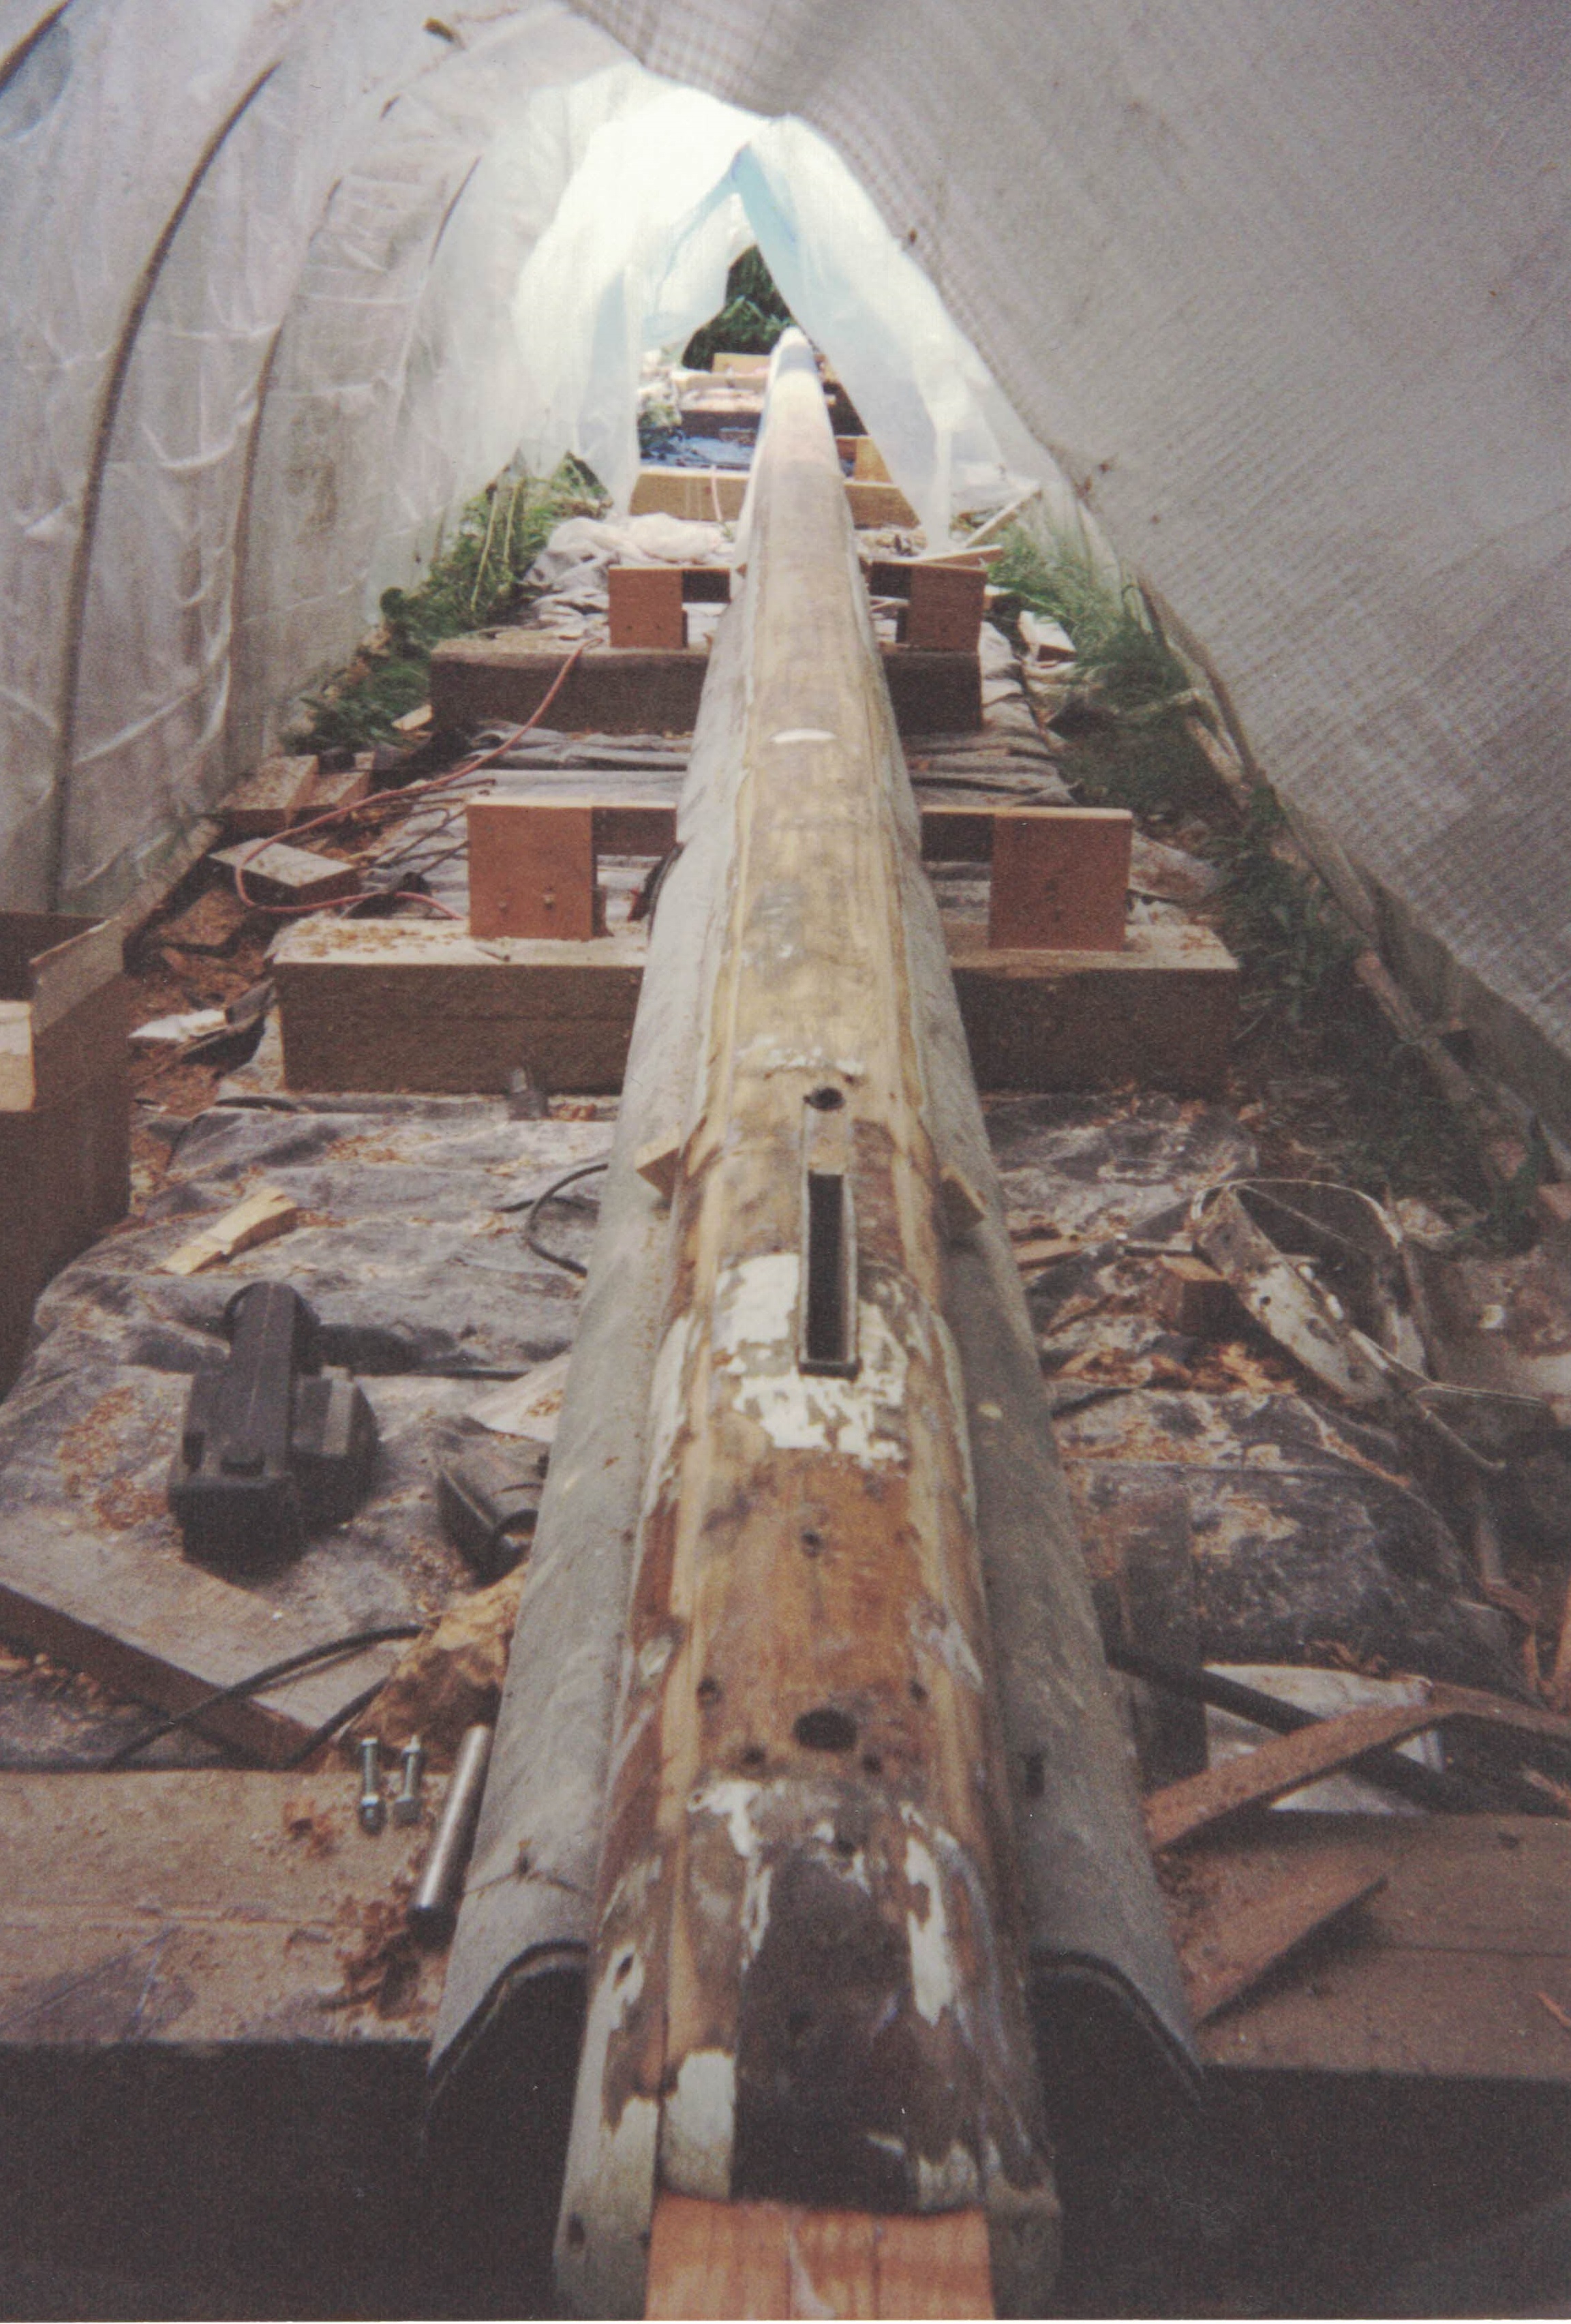
The bottom section of the mast that had been below deck had come unglued. I’m not certain why the section that had been best protected from the weather was the most affected. The photo below shows the mast laying inside its shop space. You can see the seams in the lower section are completely free. The block that forms the plug in the bottom of the mast is floating free.

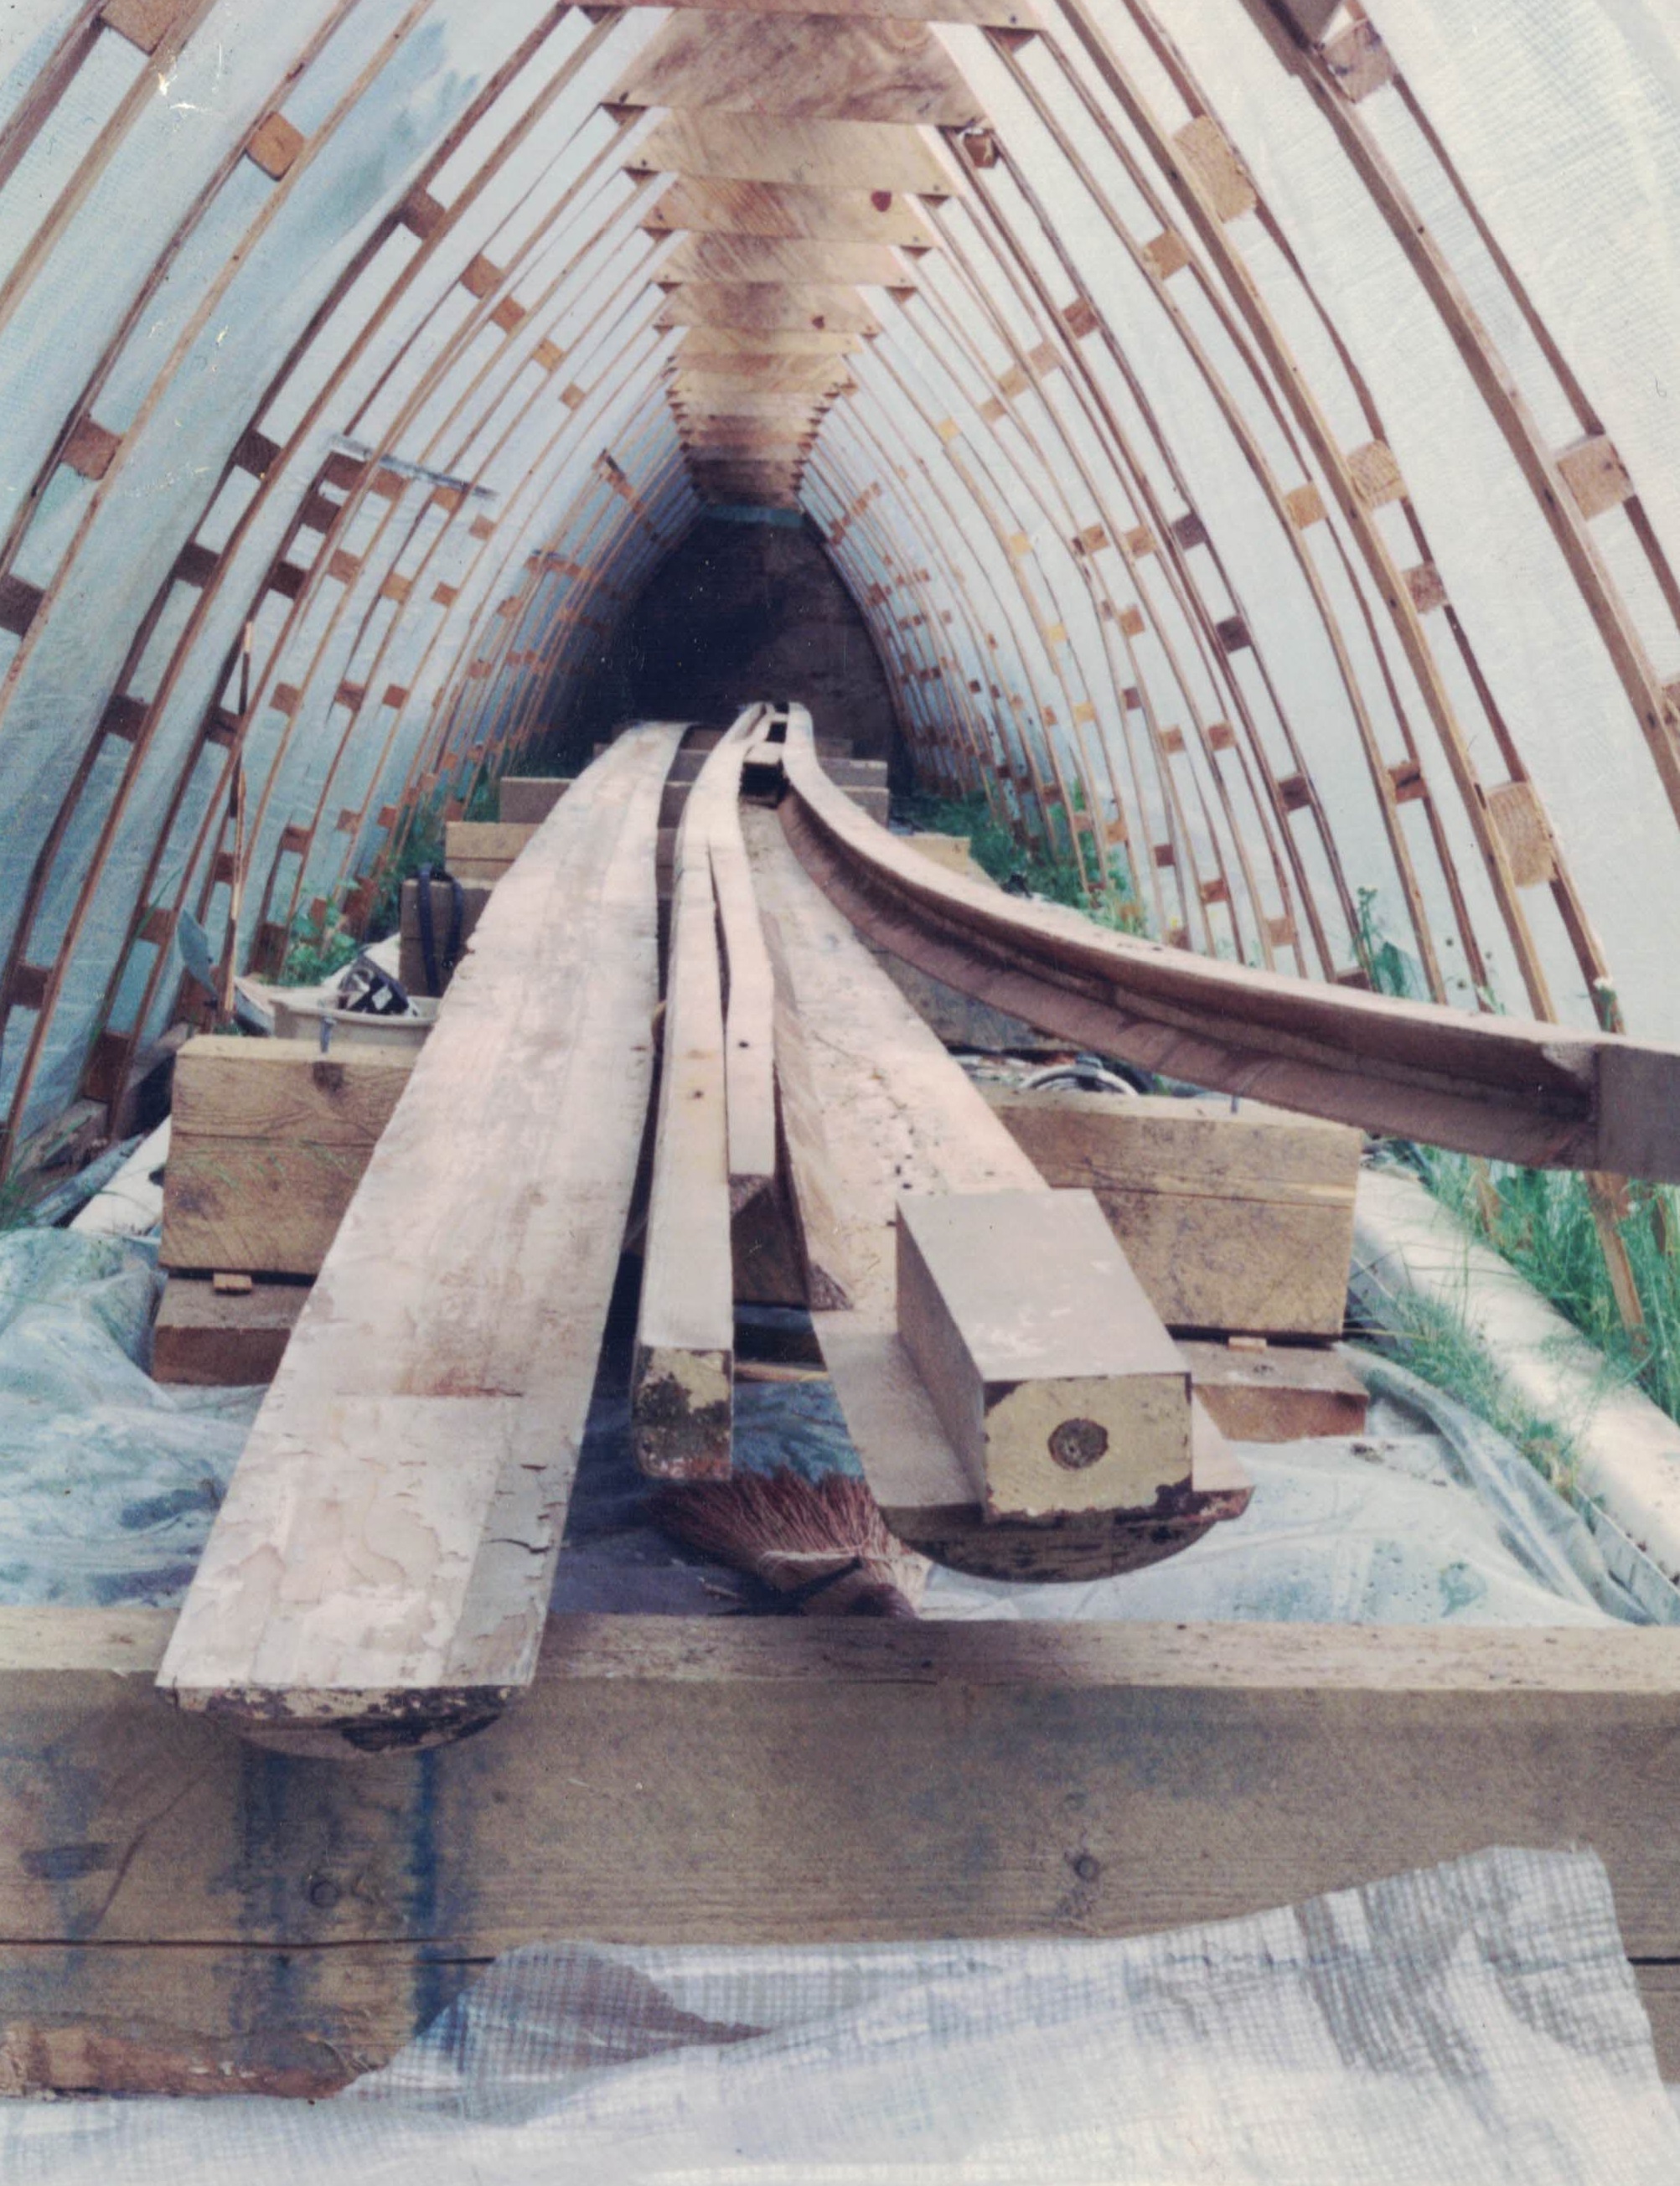
There is not standing room in this tent thing. It’s a good thing I was a lot younger then. I had a plan but basically had no clue what I was doing. The idea of building a mast intimidated me. I learned enough through this process that it doesn’t scare me much now, but back then it did. Since the glue was giving up, I figured all I needed to do was help it along. I made some hardwood wedges that I tapped into the seams so that it put some stress on the glue joint. The idea being that I would continue to move these wedges up the seam as it let go and I would have all my pieces so that I might glue them back up. I was not completely convinced this would work. For one thing I had no idea what I might find inside the mast. Inspection from the exterior lead me to believe the wood was sound, but one never really knows until they get a look. As a precaution I took measurements of the cross section at each foot so that I could replicate this mast should the effort to save it become a disaster.
When looking at the photo above, it would seem that this idea had merit. But it didn’t! When I tapped the wedge in it bottomed out where the gusset piece was glued in. I spent the winter checking on this progress and made none. I had plenty to do, so I sort of let this simmer while I worked on other aspects of the project. However, spring eventually came around. I was out of town delivering freight with the landing craft and we got a few unseasonably warm April days. Temps went into the 70-degree range. I had a small fan (A Nicro Solar Vent) to keep air moving but I was concerned when I got home about how hot I assumed it was inside the tent. Or should I say “greenhouse”. As soon as I hit the dock I was over there to check on it. What I found was disheartening.

The end of the mast looked like a broom that had stood in the corner for too long. As you can see in the photo above it took on a new shape when the temperature went up rapidly. I was not a happy guy. In more or less a fit of rage I took an old machete that I had in my truck and a large hammer. I used the machete like a froe, laying it in the seam and I started driving it with my hammer toward the top of the mast. It turns out this is exactly what the doctor ordered and in about 15-minutes I had the first seam apart!
Unsure as to my next step, I took my machete and drove it down all the seams until I had all the pieces. All along I had planned to clean up these pieces and glue them back together if they were sound. I hadn’t planned on this mess. I’m not sure how I planned to set up a gluing jig. But a plan developed. As I saw it, the mast took on its new twisty shape because of heat and moisture in an uncontrolled environment. So, I decided to straighten the pieces of wood using heat and moisture in a controlled environment. I needed a strongback and a steam box. My line of thinking was that if you could steam bend wood, then why not steam straighten it as well.
One of the jobs that had come up with the landing craft had provided a large quantity of guardrail, like the kind used along the highway. It was removed from a remote project and was hauled out as scrap. I had taken quite a lot of it for my own use. It occurred to me at some point that it would work for a strongback. When the mast was originally built, a strongback had been made of timber. But the mast was rectangular in cross section then. It was now oval and the guard rail would accommodate this cross section. I chose pieces that had not been damaged and laid them together, three layers deep with ends staggered so that it would be strong and true.
I placed a wooded batten in the bottom of the trough so that the oval of the mast would lay in the hollow. It was all through bolted to hold it rigid. It was trued using strings and levels. The taper of the mast had been measured prior to taking it apart and the strongback was adjusted to compensate for the taper of the mast.
As for the rest of this plan, I was making it up as I went along. I can remember using sharp chisels to clean the old glue off the surfaces. It was not hard work but tedious. The glue was Aerolite and left a tan crust on the wood. For the most part it came off with scraping. I decided at some point to plane all the surfaces to new wood. Originally the inside surface of the mast was treated with varnish. Between this and the glue I guess I was concerned about getting the wood cleaned up and providing a tooth for the epoxy could get a bite. Frankly I can’t remember the exact thought process.
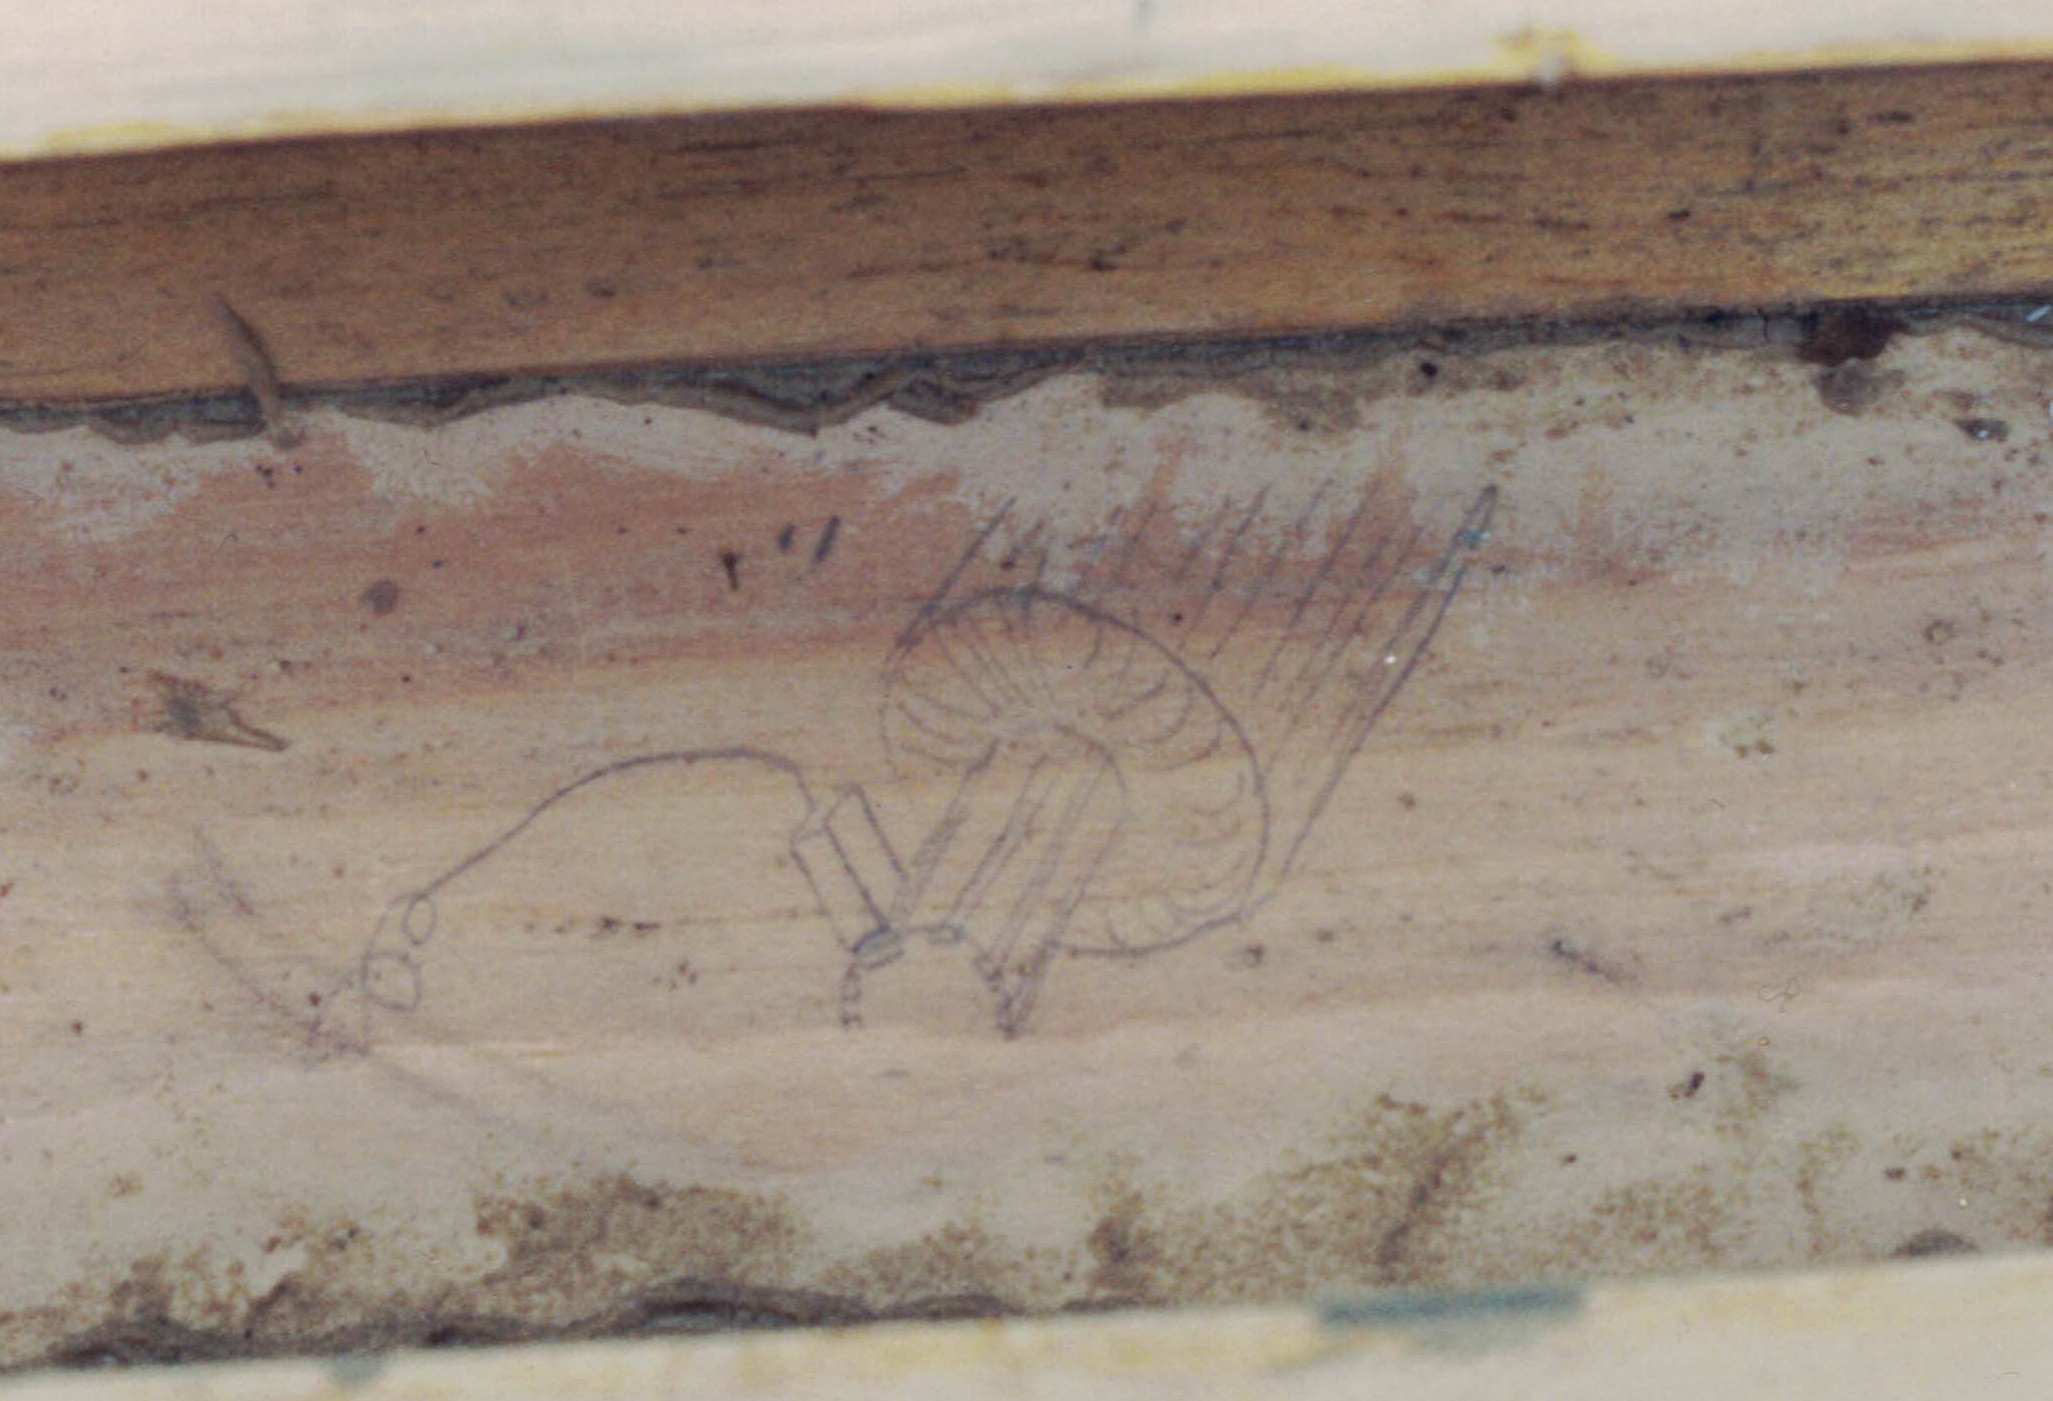
However, the good news is that the wood was sound. I was delighted to find the drawing shown above inside the mast. I could imagine a couple of fellows taking a break from their work to discuss a project and one of them rendering a good drawing of an armature and brush. Here it was, years later waiting for me to find it.
Once the four main pieces of the mast were freed, they were fairly easy to pull straight in my jig. I had to reglue a few of the scarf joints but if they didn’t come apart with me flipping these 61-foot pieces of wood over in my tent, I decided there was no point in forcing them apart. Each piece was placed into the gluing jig and pulled straight. They were held in place by running a long deck screw right through the plank and into the batten in the bottom of the jig. They were then planed while held in place to clean them up, being careful to keep the surfaces true.
When one steam bends wood, the wood is heated and the moisture content driven up so that it might be bent into a shape and then held there as the wood cools and dries. This is essentially what I was going to do, but with the plan to hold the pieces straight. The photo below shows the pieces of wood laying in the jig with my makeshift steam box. It was not practical for me to try to generate enough steam to do all 61-feet at once. Instead I did about ten feet at a time. Each piece was done individually, but I don’t believe I went clear to the top of each as those sections were pretty true. I wanted to relieve stress in the wood, but I mostly I just needed to be able to get the pieces to lay true enough to get them glued up.

The steam was generated by using a pressure cooker on a camp stove. The hose that runs into the so called steam box was attached to the lid of the cooker. The chamber is made from screen and rubber roofing material. It did not generate a lot of heat, but it did a good job of increasing the moisture content of the wood. As each piece was laid in the jig, it was fastened in place and steamed. Then the next piece was laid on top, with stickers between to provide air space and room to slide the screen and rubber through. This way the pieces were not released until well after the steaming process. I don’t recall now how long they were left in the jig before I moved them.
Not only was the process of reconditioning this mast slow, this narrative is going to be fairly long. However, this was all interesting work, for myself anyway. In reality it was creative play. I was never sure it would work, but I knew I was gaining experience that would come in handy somewhere. I always assumed that one day I would be making a new mast. And you never know, one day I might! I live in the land of Sitka spruce and have my eye on a few trees just in case.
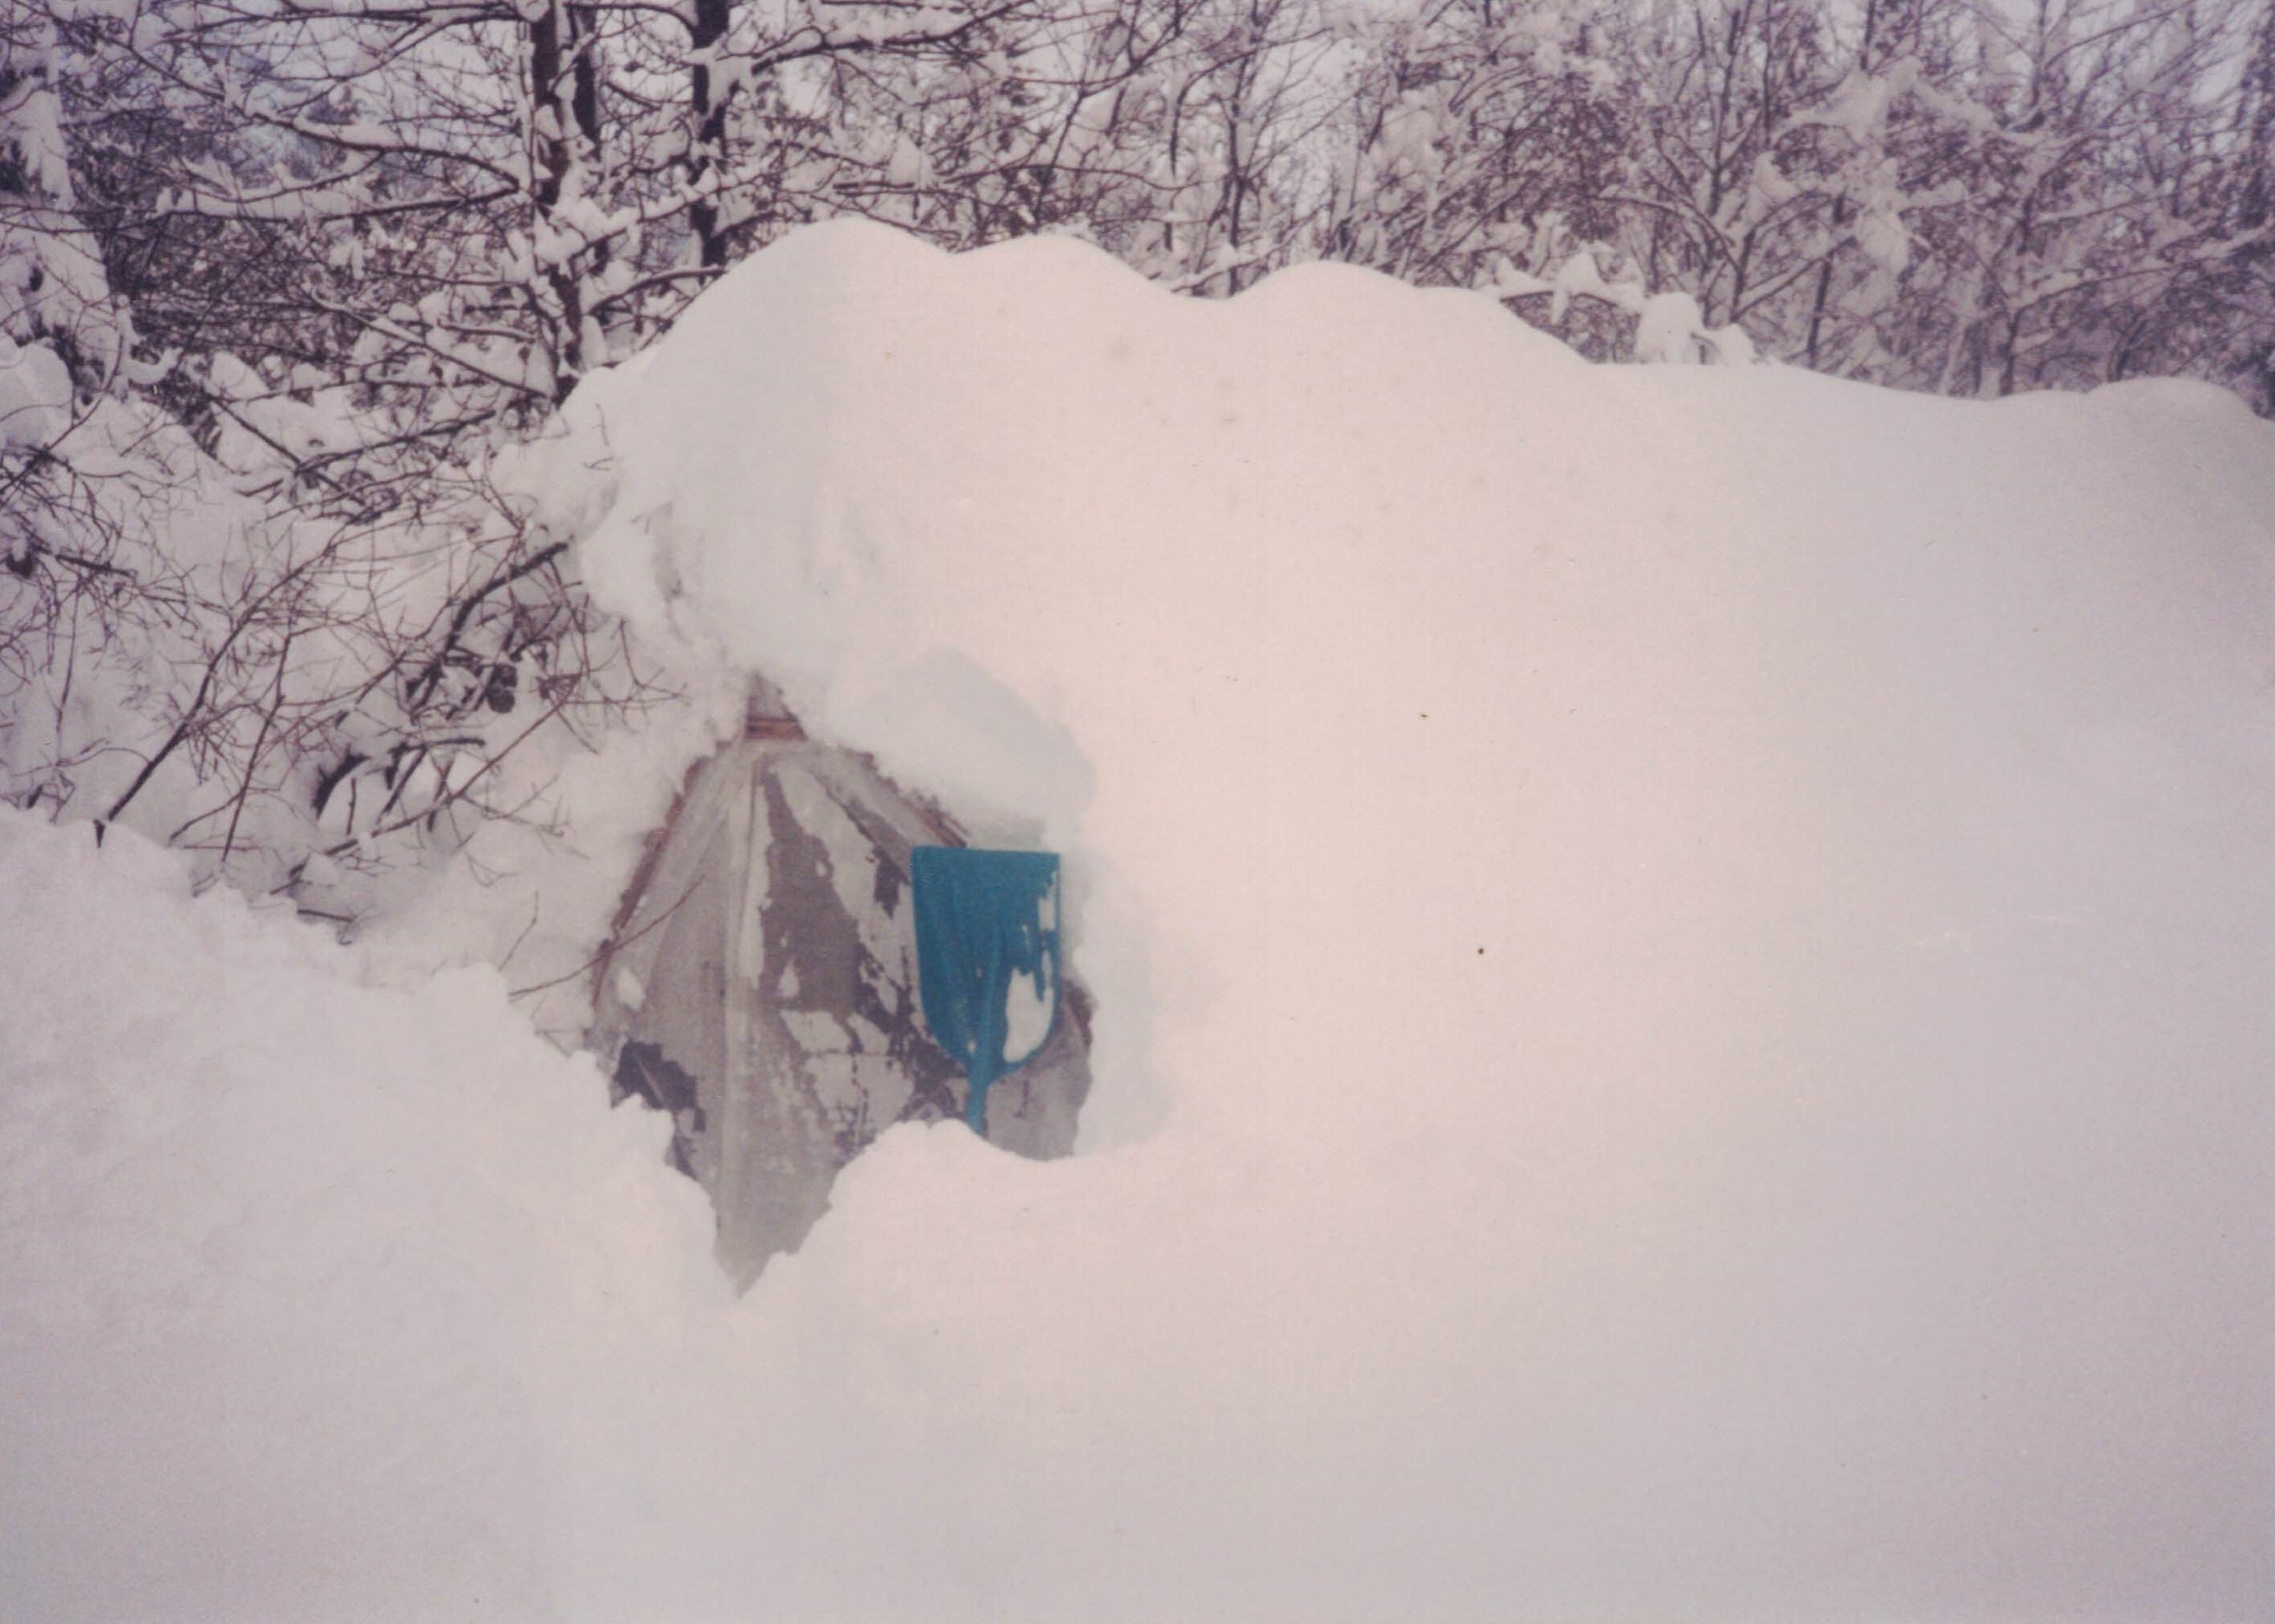
The photo above shows my snow shovel propped up outside the tent structure. The shovel is about four feet tall. Needless to say there were periods when the mast just rested and waited. To be honest I can’t say now whether it was in that yard for two winters or three!

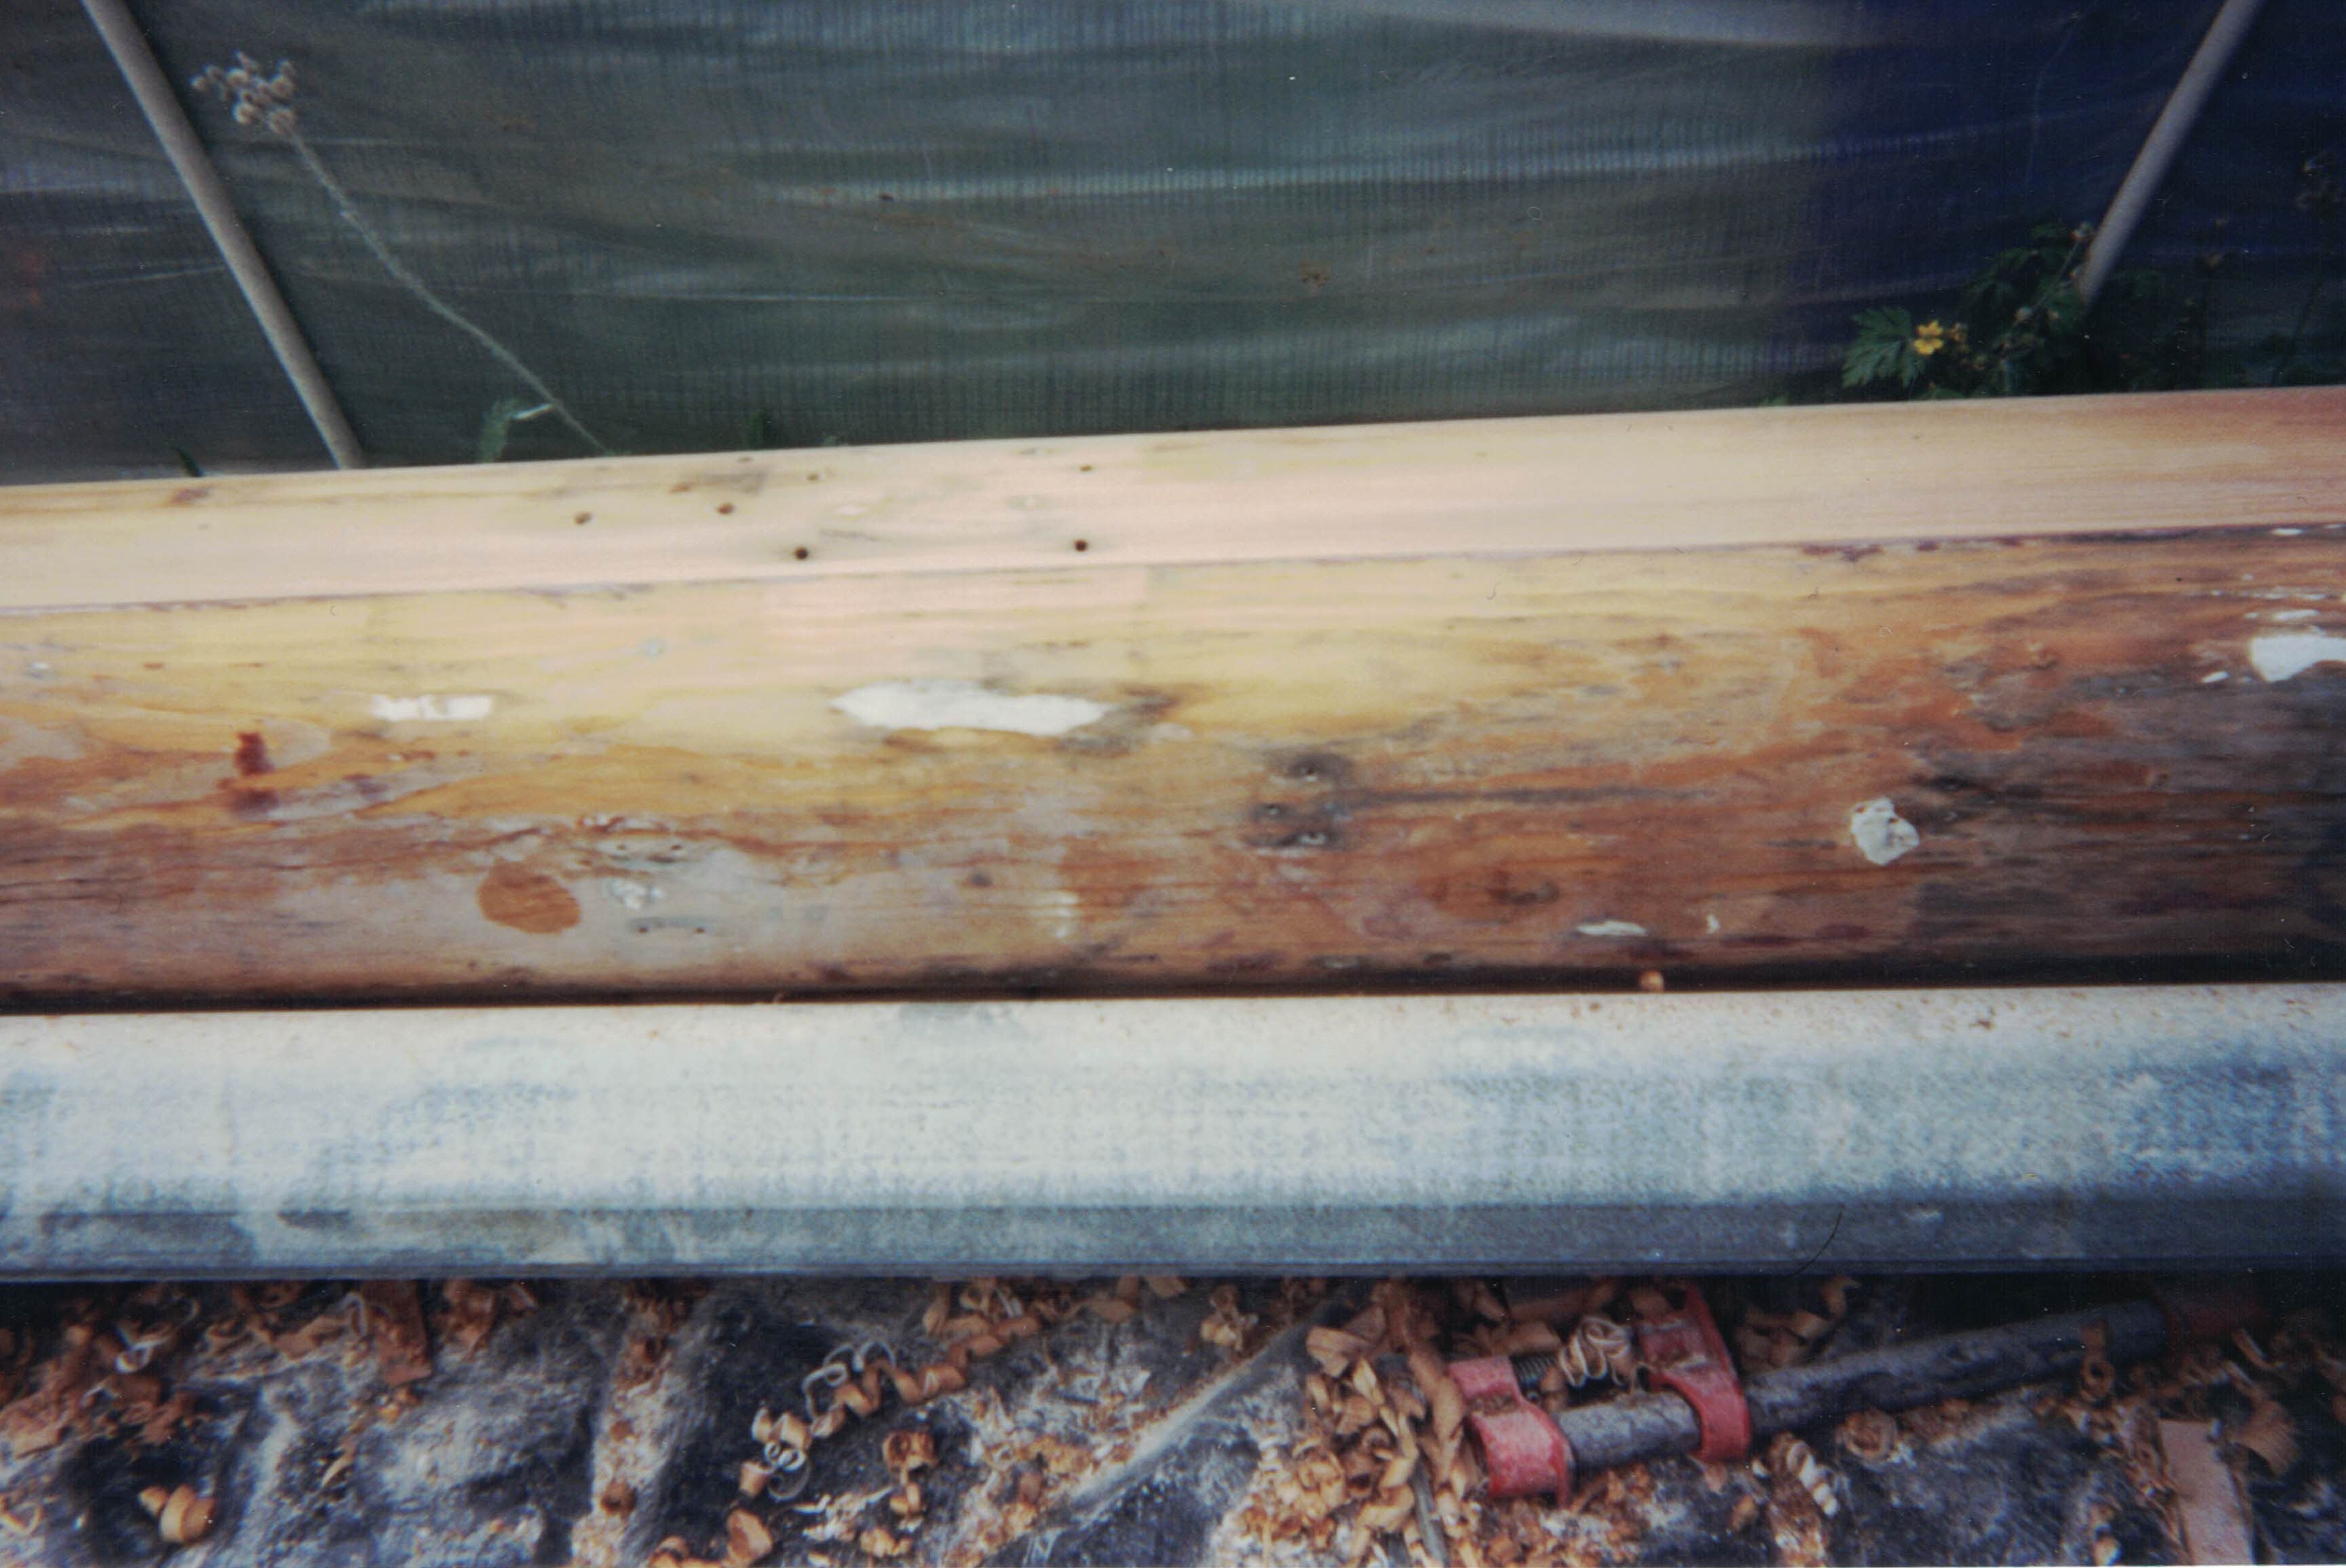
Just to make this narrative more complete I will mention that at the locations of the spreaders there were tapered blocks as seen in the photo above to add some rigidity to that section of mast. No idea if they are really needed, but I remanufactured them and put them back as they were, on port and starboard sides. They are about four feet in length. It can also be seen in the photo above that some of the glue joints on the triangular gusset pieces had failed as they were hanging loose from both sides. Not pictured in any of my photos, I also added 3/4″ poly pipe on the inside of the mast to use as wiring conduit. So that it might be fastened on the inside of the mast to prevent slapping but would allow me to pull new wire through if needed. Turned out to be a good idea too since I put a screw through my brand new wiring, shorting out my masthead light and had to pull new wire in.
Eventually it came time to start gluing stuff up. First the triangular gusset pieces for the inside corners were glued on to the fore and aft sections of mast. Screws were used for the clamping force and removed after the epoxy cured. The gusset pieces were placed as to be true with the sides of the planks. This would then offer a large gluing area for the side pieces. In the photo below, the screws are still in place.
Once the gusset pieces were glued to both the fore and aft sections, the whole thing was assembled as a trial. I made clamps using seat belt webbing that would wrap around the mast. Each end was looped around a length of angle iron which were pulled together with bolts. The plan was to assemble the mast without gluing, clamp it in place and leave it through the winter to await proper weather for final gluing. I checked the mast using strings to make sure it was laying in column.

There is a lot going on in the photo above. Foremost is the fact that we had a huge winter storm that crushed my structure from weight of the snow. This was unfortunate, but the mast is actually resting peacefully here. It might be noticed that at some point an interior skin was added to leave an airspace between outer and inner skin and reduce sweating. I see I have a kerosene heater in here, I suppose to keep things warm enough for some of the final gluing I had done before winter. This may have been when the second skin was added to help with heating as well. And then there are my strap clamps that I made. They were clever and they are doing a good job here but were scrapped before the final glue up as they were too slow to assemble. As a result a different clamping method needed to be devised so that I might get the whole thing clamped up before the epoxy started to kick.

The two images above show the clamps that were eventually used. They are crude in comparison to the previous clamps but they were fast and effective. The beam is just a scrap of 2 x 4 drilled to accept two pieces of threaded rod. The rod had been bent with a hook on the lower end so that it would hook on to the guard rail. These were pre-adjusted so that one side could be hooked, the other swung into place and only needed to be tightened about a half inch to bring up pressure. Wedges where used to provide pressure over the arced surfaces. It might be noticed that my tent is a much more ragged affair. Effort was not wasted on making it any more than what was needed to finish.
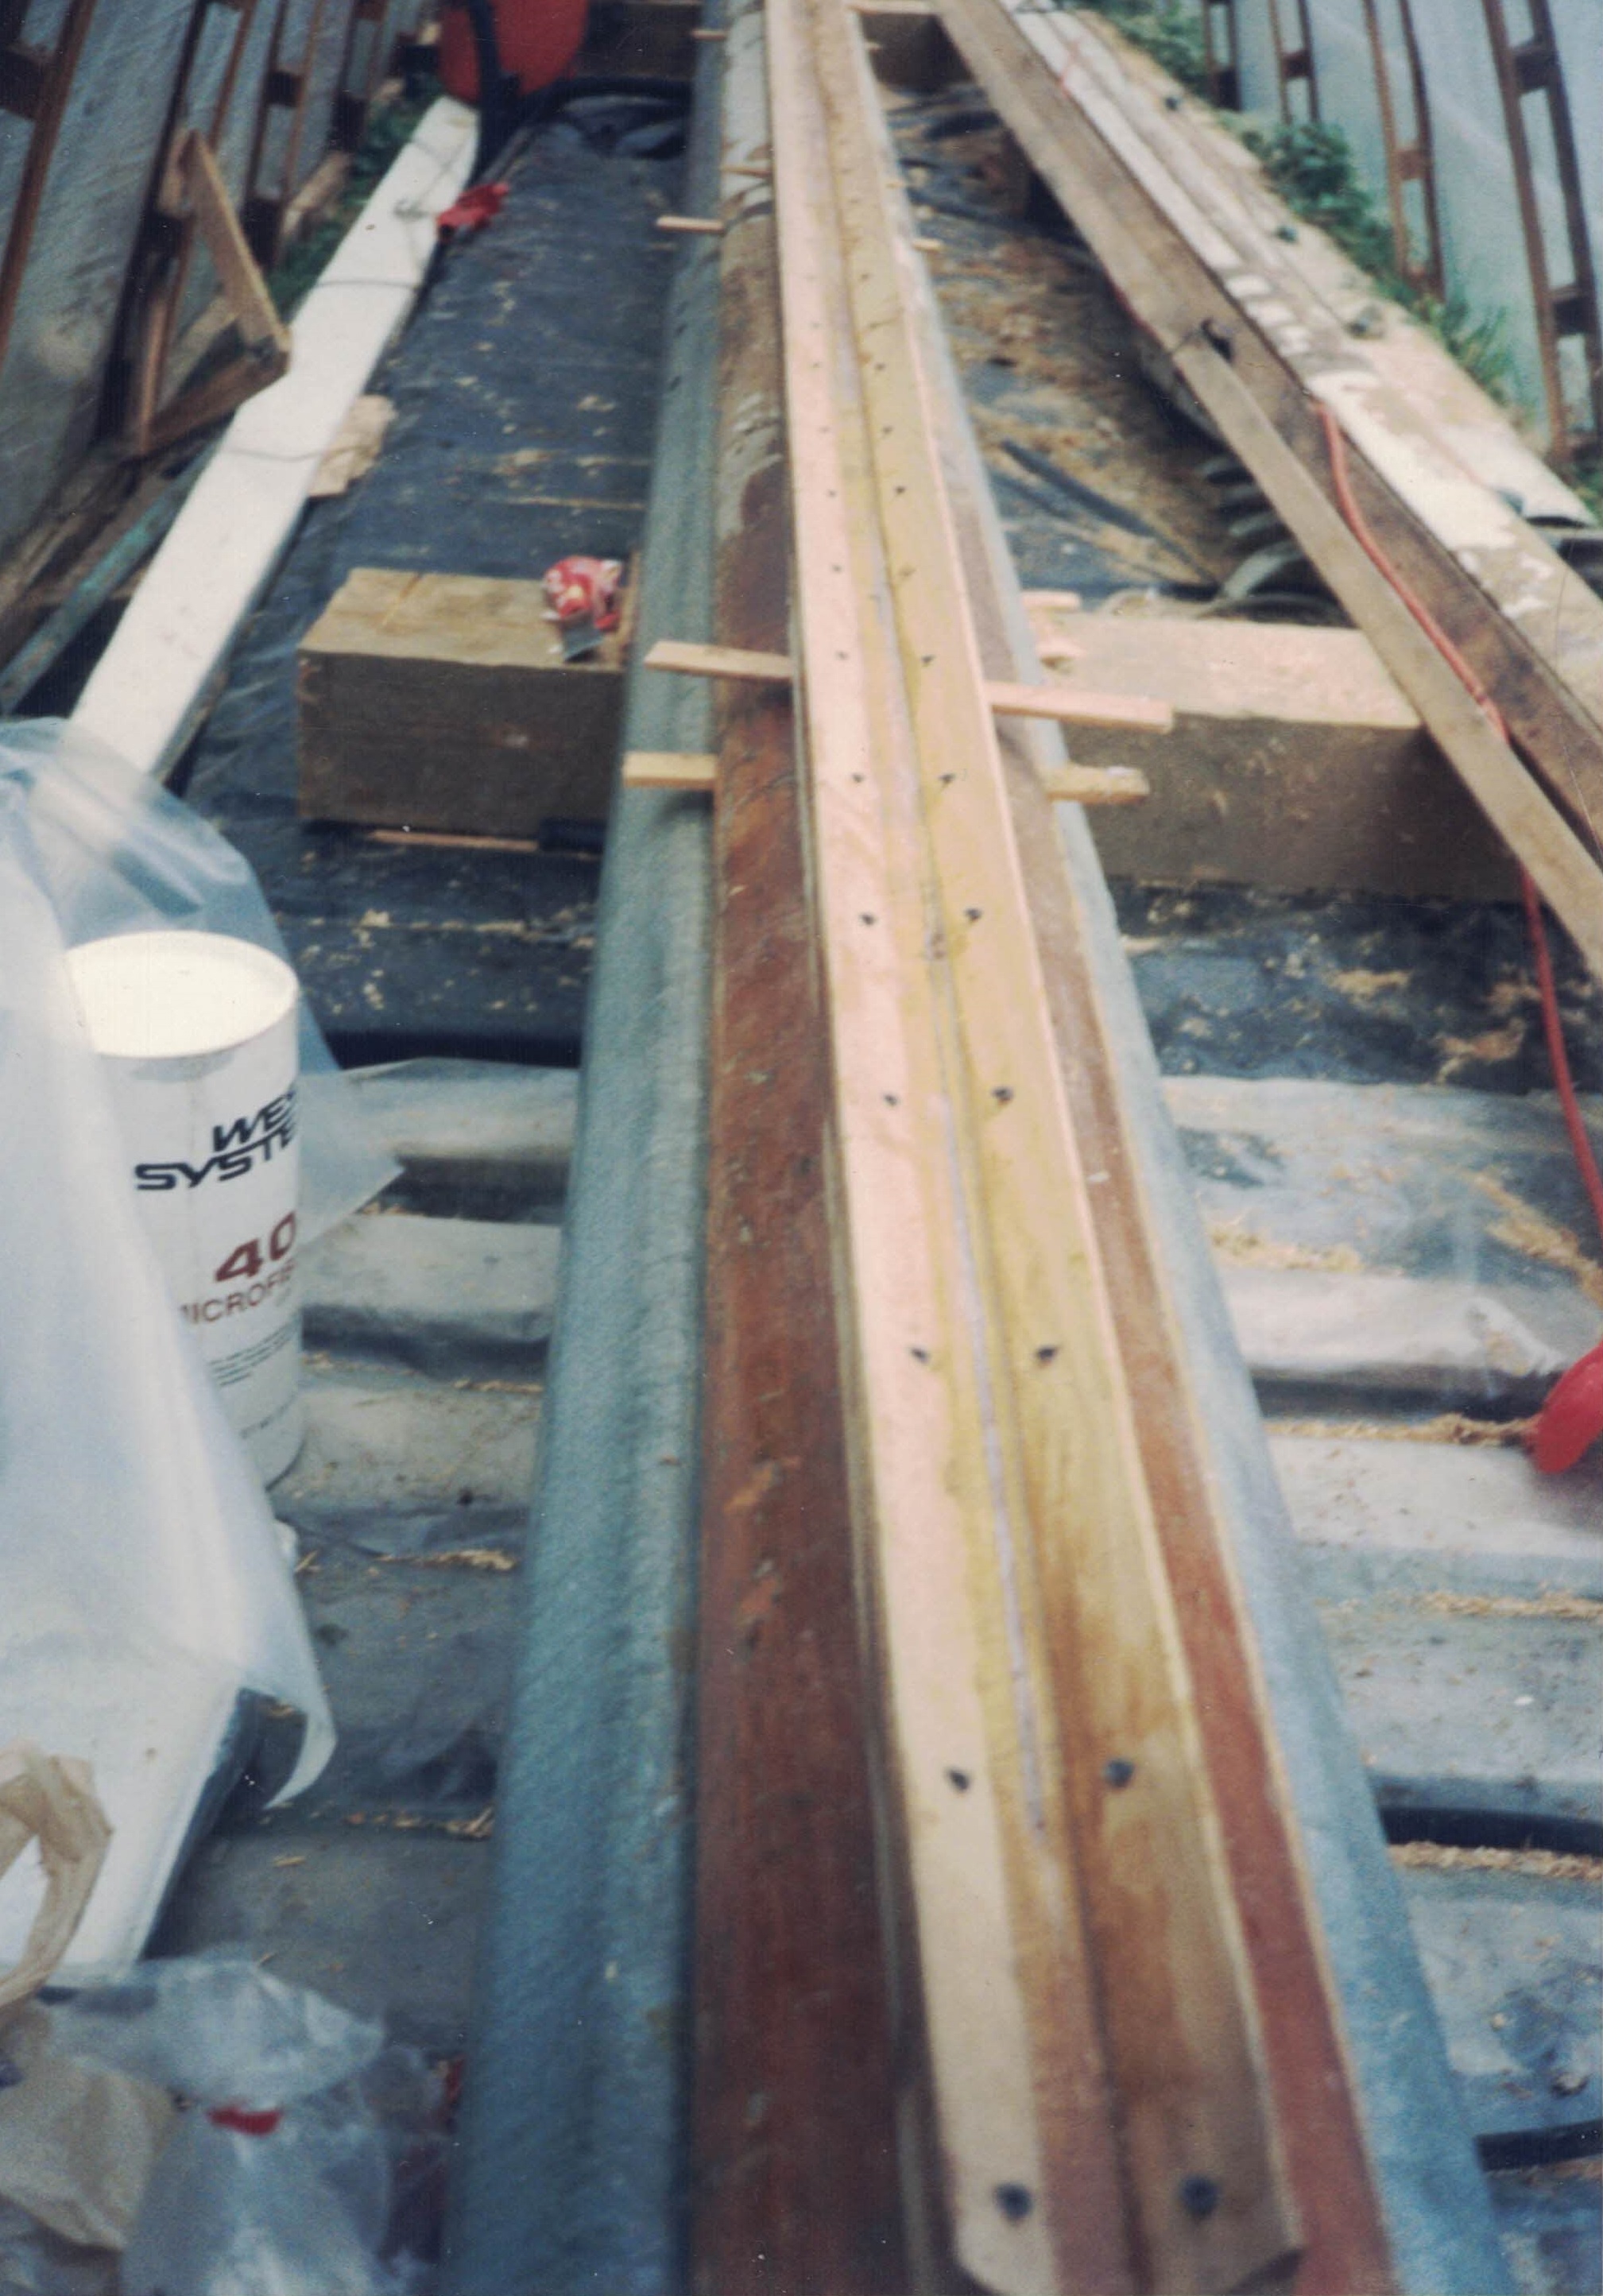
The images above show the mast after gluing. In the lower one, the plug that was glued into the top is visible as it has not yet been trimmed off. The box for the main halyard sheave is fitted here in a trial run. As you can see, the mast was not suited to being varnished at this point. I’m not sure now how it was decided, but again it was decided to use cloth and epoxy over this structure. I’ve read the horror stories about wrapping wooden masts. I’ve read similar accounts as to why they should not be painted as well. However it was decided to use Dynel cloth and West System epoxy. I’d read about the benefits of Dynel over using fiberglass cloth. It was the notion that it handled cyclic fatigue better than fiberglass that was the deciding criteria for choosing it. Again, I realize this is one of those things that might be argued into infinity as to whether it should be done at all. But done it was. That part is fact. Twenty years later, I’m glad I chose Dynel and while I always thought I was going to be building another mast. I have yet to do it. I can say with all honesty that I use the freeze test to verify that I’m not getting any moisture in the mast. If it gets wet and freezes, the expansion will break the cloth surface. It shows up as cracks. I’ve had this experience on the deck, but not on the mast. So now, I’m hoping this mast holds out as long as my sails do. Should it be needed to build a new mast, one might want to go back to a fractional rig, which would of course change the sails required. None of which would be inexpensive. As long as I have a good mast and good sails to hang on it, I will avoid changing any of it.
Eventually, the mast was wrapped in Dynel and epoxy and sanded to fair the seams. The cloth was laid on in a continuous piece both fore and aft with the seams on the sides. There came the day when it was time to move the mast to a location nearer to the boat. There was still lots to do. Paint, hardware and rigging. There were decisions that needed to be made about the rigging that I was not equipped to make without some help. I found that help, but I think that is better left for the section on rigging that I have yet to write.

Next: 1995. Where are we?
Previous: Coach Roofs and Coamings