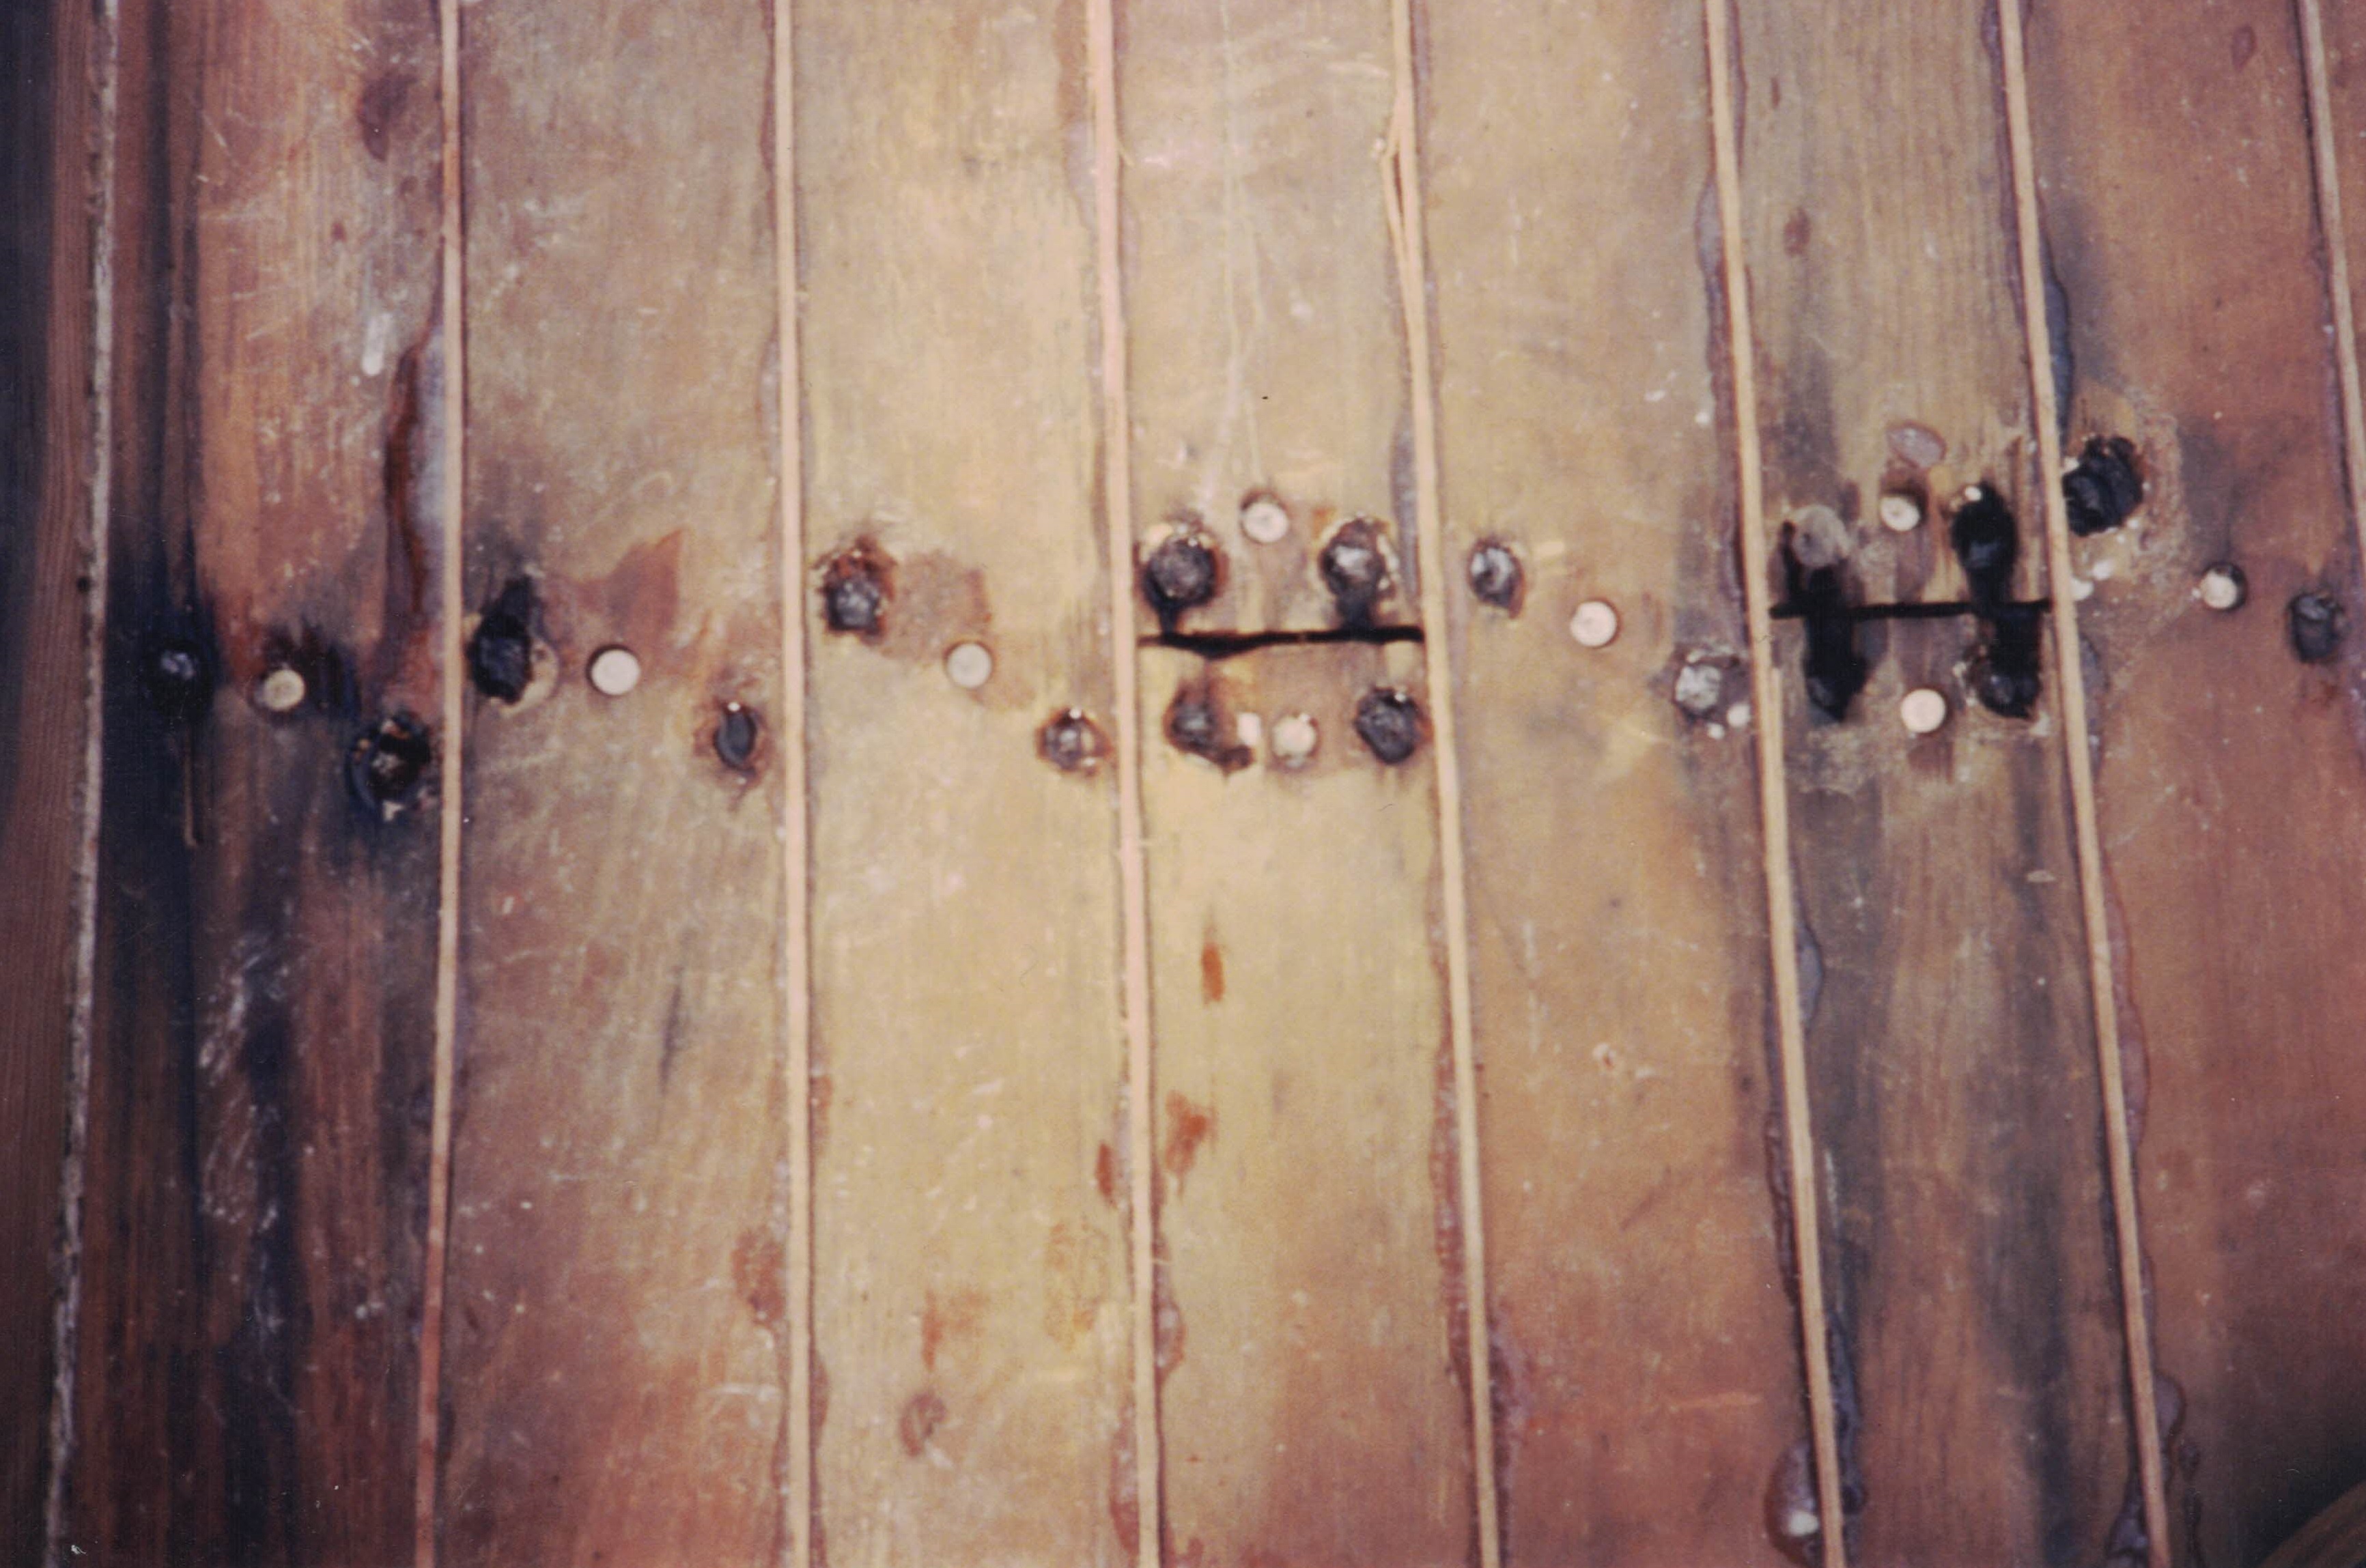
For the most part, what I found when I cleared the fiberglass sheath from Leda’s deck was good news. The term “fiberglass” has become the common term in the U.S. for polyester resin reinforced with fiberglass cloth and would be used by many regardless of what the cloth or resin actually is. So I use it here but others may prefer GRP (glass reinforced plastic) or FRP (fiber reinforced plastic). The deck looked pretty good, however one issue was that Leda’s decks had been nailed using large square-shank galvanized-steel nails. I don’t happen to have a photo handy of one but I suppose they are four inches long. The shanks are tapered to a chisel point, maybe as large as 1/4″ or a little less. It was obvious these had been getting wet. The heads showed severe oxidation with layers of rust flaking off.


By this time I was trading letters with Dooley Wilson. He was quite keen for information on the project and I was quite keen for his input. After Dooley built Leda he had gone on to build other boats, had become a multi-hull enthusiast and had experience well beyond my years in a wide variety of techniques and materials. He admitted that the galvanized nails had been a “false economy”. I gave him a pass then and still do. I know that by the time they got to putting Leda’s deck down that the project had its own momentum. A decision needed to be made about what to use for these fasteners. Cost and availability would have been factors. I can imagine that these nails were much easier to source. Then there is my own experience of being twenty-something years old. It is nearly impossible at that age to worry about 50-years later.
I was concerned about the condition of these nails and admittedly disappointed that they were not bronze or copper. Bur removing them was not feasible unless we tore up the entire deck. The wood was for all intents sound. I’ve wondered in years since if I should have taken up the top layer and laid plywood or something else over the top of the diagonal planks. But this is kauri and I couldn’t quite bring myself to just tear it out and replace it with something I would have viewed as being inferior. Finally I took a long, narrow drill bit and carefully drilled down on all sides of a few of these nails so that I might pull them out of the deck beams with as little trauma as possible. I took nails from different parts of the decks. Below the heads the hot-dipped galvanizing was still bright. This was exceptionally good news.
By now the plan was forming to clean this all up and basically repeat the process I was stripping off. What? I know! Dooley and I cooked up the idea of using West Systems Epoxy and cloth to cover the whole works. It was viewed as a mistake during the previous attempt to not remove everything from the deck. I was fixing that, as everything was off or getting there. Couple that with the improvement in the technology, specifically that West System had a much better reputation for adhering to wood than polyester resin. I’d been studying the use of West System Epoxy and Dooley had fairly extensive experience with it. I know there are some who will read this that will question whether this was a good idea. I question whether it was a good idea. But given all the factors, I think it was. Read on before you judge. If one day a person comes along who would like for Leda to be just as she was in 1949, then the boat will be well enough preserved to go there. At my juncture in time, I was not prepared to tear the deck and cabin off and build it anew. Anything done short of completely rebuilding with new materials would have required some sort of work around.
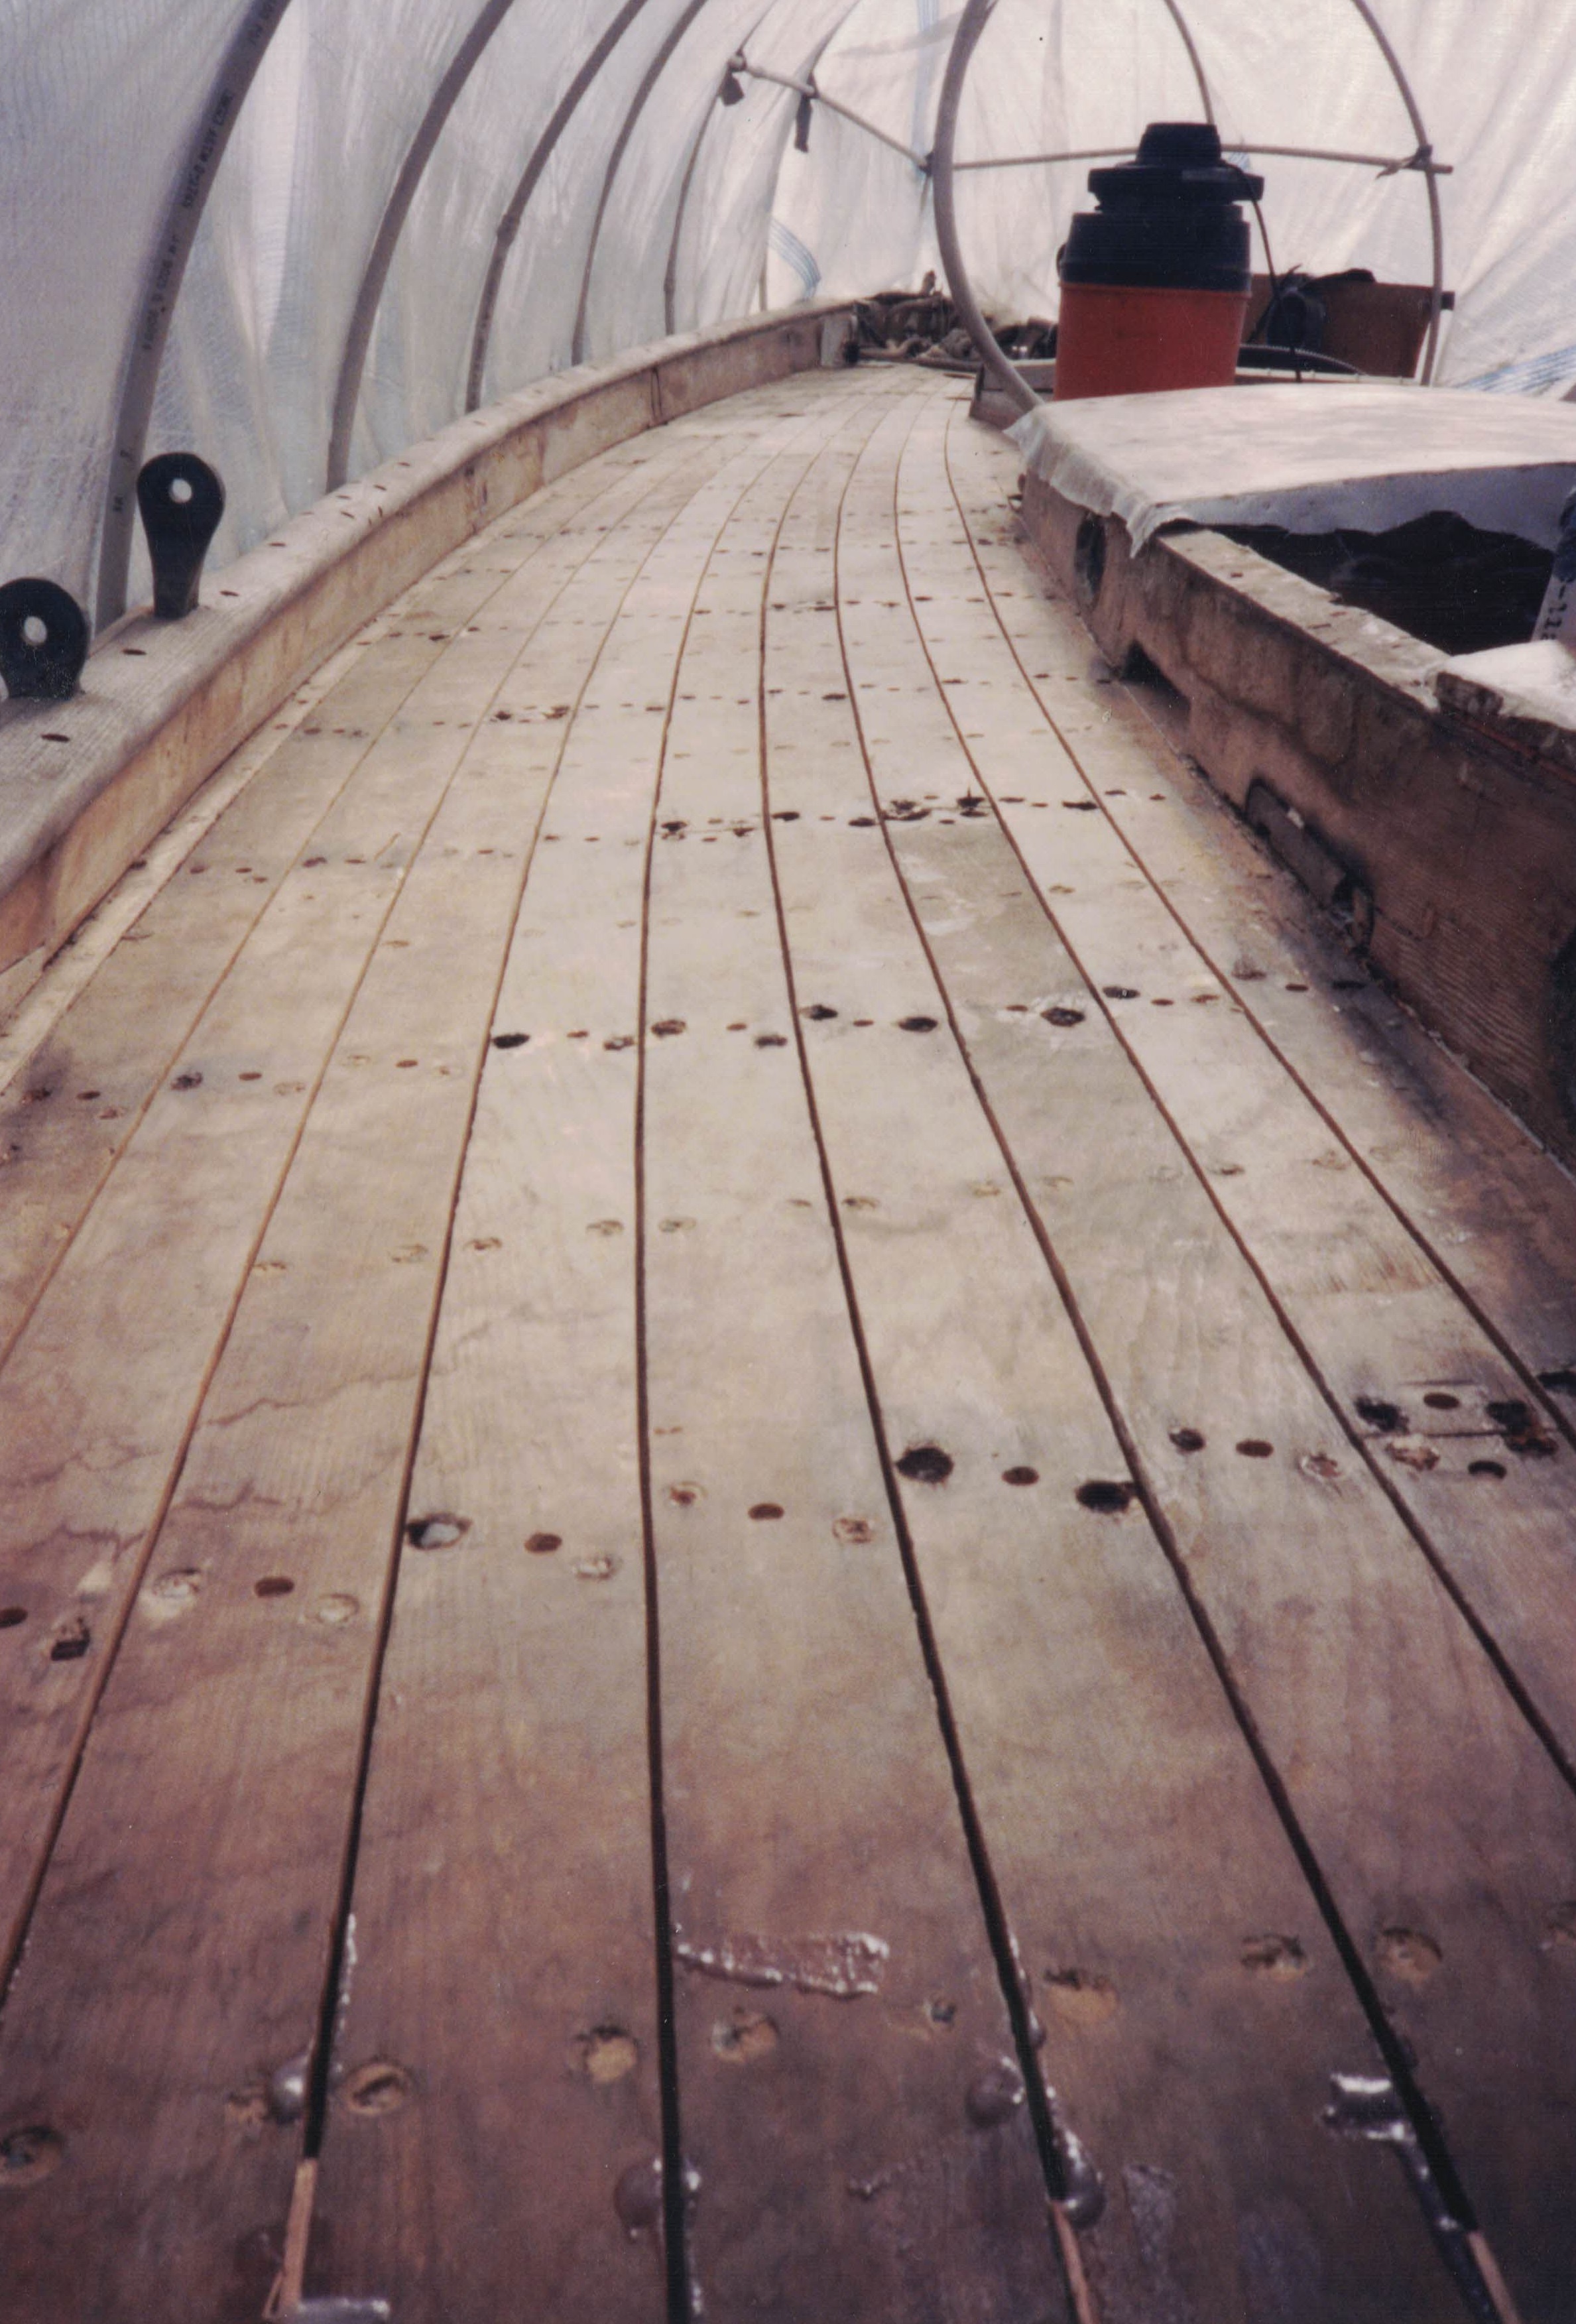
Armed with this plan, I went about preparing the deck. The fasteners were all ground down with a Dremel tool to remove rust and scale. I mixed West System Epoxy and thinned it with acetone so that I might pour it in to the recesses for the nails. One problem with the deterioration of the fastener is what this does to the wood surrounding it. The epoxy was thinned so that it would penetrate any of the wood fiber that had been compromised. It also coated the steal that was exposed to limit further corrosion. I bought four-inch silicon bronze ring-shank nails. The planks and deck beams were all drilled and the bronze nails driven home to ensure the deck was well fastened. Then a circular saw was used to clean out the seams, as they were filled with old caulking and polyester resin. I reset the blade of the saw so that it would make a nice wide, uniform cut. The plan being to glue in wood strips.

I wish I had a dollar for every time I sanded this deck. The abuse to the knees and body is not one of the expenses originally calculated. I discovered that if I pumped my epoxy into zip-lock baggies that they could be laid flat on a surface and mixed by passing a plastic squeegee across the bag, alternating with some kneading with the fingers. This sped things up for both mixing and delivery as then the corner of the bag was clipped off to the desired size hole and the epoxy could be squeezed out in a controlled manner.
In those days, if you went to the lumber yard and bought mahogany, what you got was called “Philippine Mahogany” which is really luan also spelled lauan, or familiar to those outside the U.S. as meranti. This was readily available and is what was ripped into strips for gluing into the deck. I’ve not tried to buy any of this recently but at one time all of the 1/4″ plywood floor underlayment available in the U.S. was lauan board. It was one of my favorite project boards. It was easy to work with, sanded nicely and held its paint. It is reasonably rot resistant. It is no longer available here and underlayment purchased now is usually birch and poplar. I remember when meranti was looked down upon as being fake mahogany (which it is in all respects) but I certainly miss it now.
In the photo above you can see cloth ready to be epoxied to the cabin top. That will be addressed in its own post. The cabin coaming did not fare as well as the kauri deck. The coaming is Douglas fir, or Oregon pine, sometimes just called Oregon. I grew up in Oregon and have huge respect for these trees. At one time it made me sad that so much of it was cut to make plywood. Well in truth, that is what it was really good for. Lot’s of boats have been built from it and it was a common material for decking in the Pacific Northwest (of he U.S.). I never really asked Dooley how this came to be. He commented that “Oregon is awful boat timber” and we left it at that. We had shared with me more than once that as the project ground on that availability and funding was a continual concern. Douglas fir is not particularly rot resistant, and its grain is fairly heavy in all but very select pieces. The cabin coaming did not have a lot of rot, very little as a matter of fact, but it had been wet and was not very happy about it. When I got it all dried out there were places along the edge where the grain ran out that had checked.
I was walking down the side deck one day, stooped over like Igor because of the top on the boat, while wearing shorts. I ran my leg up against the coaming and peeled off one of the checked spear-like pieces of grain when it jammed into my leg. I had to break it off to get away from the cabin. As it would go, there was whiskey on board for just such an emergency and my wife offered to give me a few shots and cut the thing out with my dulled work knife. I declined the offer and decided instead to go to the emergency room at the hospital. Checking in, I told them I had a splinter, I didn’t know what else to call it. It was however about six inches long and deeply planted in my leg (and covered with red lead paint)! I waited for what seemed an impossible length of time and this projectile in my leg was really getting painful. I was sorry I hadn’t administered the whiskey. Finally when I was ushered into the room the nurse took one look at my leg and nearly panicked at the piece of wood sticking out of my leg and said that “we need somebody to look at this right away!” like it was my fault it hadn’t happened yet. It was finally removed, stitches applied, antibiotics prescribed, lectures given. The doc had much better humor about this than the nurse and we talked boats and projects for a bit.
Two things came about from this. It was determined that the coach roof and the coamings needed to be moved up in priority. I also stocked new razor blades on the boat. It was discovered that by buffing the edge of a new blade with a buffing wheel and some white rouge (metal polish) that you can make it scalpel sharp in short order. It wasn’t the last splinter, but it was the last time I went to the emergency room to get one out!
This also played fairly heavily in the decision to use West System Epoxy to more or less glue everything back together. There is part of me that wishes I had taken the cabin apart and made new coamings. There is the other part of me that thinks I would have been crazy.
Next: Coach Roofs and Coamings
Previous: The Plan Emerges