It’s easy to say we had a plan, but really it was more of a direction. In truth the plan according to my line of thinking was that we would get Leda ready to go, sell our house and shove off for adventures of an undetermined nature until we found the right opportunity to start life on different soil. That or win the lottery. So now that we have determined that I had unrealistic expectation, let me defend myself by saying that this sort of delusional thinking is exactly what is required for the project at hand.
We needed to clear the deck. Literally. Every cleat, stanchion base, sail track, winch and pad, everything. It all had to go. Getting this stuff off without destroying it is a feat in itself. Not only is it expensive to buy all new “stuff”, we wanted to preserve the character of the boat. The first thing I learned is that it is easy to break or strip bronze fasteners when they have been stuck in a piece of wood with bedding compound for a long time. A heat gun became my best friend. There followed a very long period in which I would place my heat gun in a stand made for the purpose so that it projected its heat on the piece of gear or fastener to be removed. I would then go work on something else. I wasn’t lacking for that. Eventually I would come back and ease the fasteners out. This worked very well but it was slow. Slow, but I was actually getting more done with this method than by using brute force to break stuff. It was more satisfying as well. I bought up large flat blade bits (screwdriver bits) for my brace and used this to back out the big screws. I crawled into spaces only fit for a squirrel to get at things that were bolted through the deck. And we started getting it all off.
Rather than take up a lot of space in this narrative about the merits of the brace and bit I have instead gone into further detail in the posting “Brace and Bit” which can be located in the Ditty Bag section.
One of the things I worked on while the heat gun was doing its job of warming hardware was stripping off the fiberglass. A heat gun was good for this too. Warm it up and pry, yank and peel. Most of it actually came up pretty easily.
I started a diary of work so that I would have a timeline to look back on. It would come in handy now except for the fact that I stopped writing in it after about a month when the daily recording became nothing more than “took stuff apart”.
I don’t think there was much of a plan at this point for putting it back together as I didn’t know for sure what I would find. The gear that came off was piling up. I had buckets of bronze fasteners, some usable some questionable. It didn’t take long before our beautiful boat was a proper mess. During this process I never did throw away any of the fasteners unless they were seen as compromised due to corrosion or damage. But I also bought a lot of new fasteners. I still have about two hundred pounds of bronze fasteners stored away here. I checked recent prices on this stuff and discovered it would have made a decent retirement plan to put more of this stuff away. The problem being that I might be the only buyer for it.
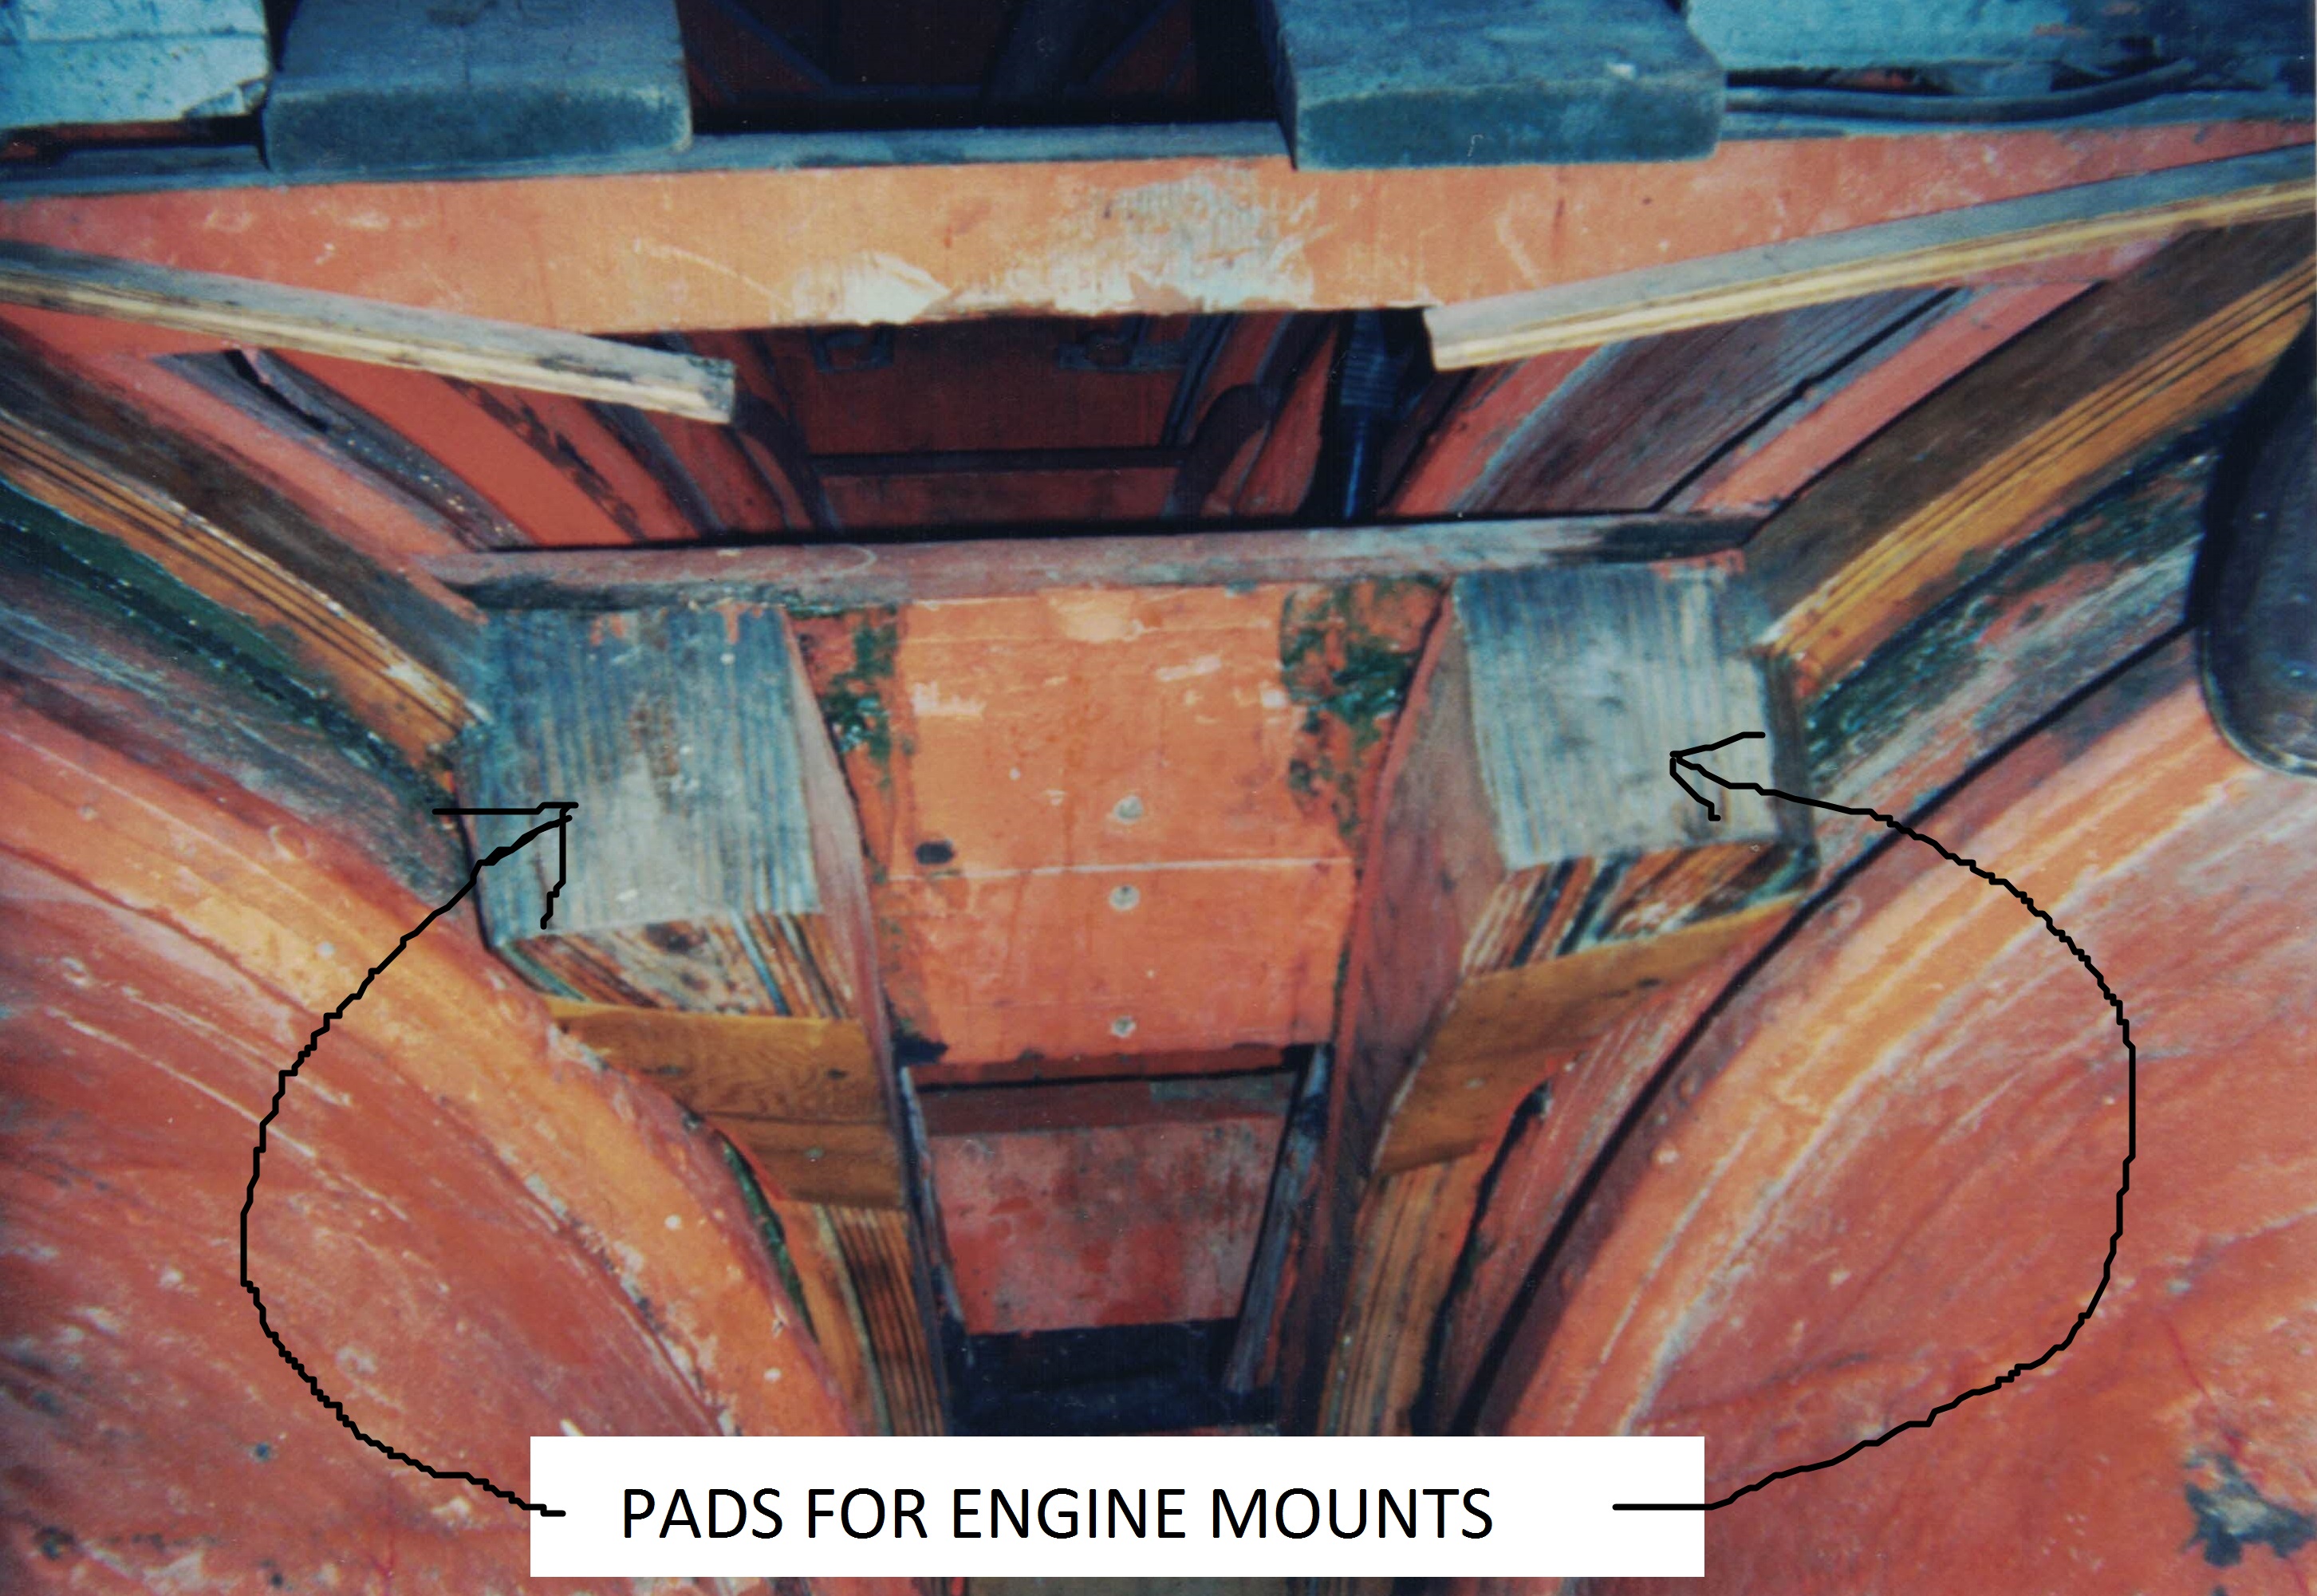
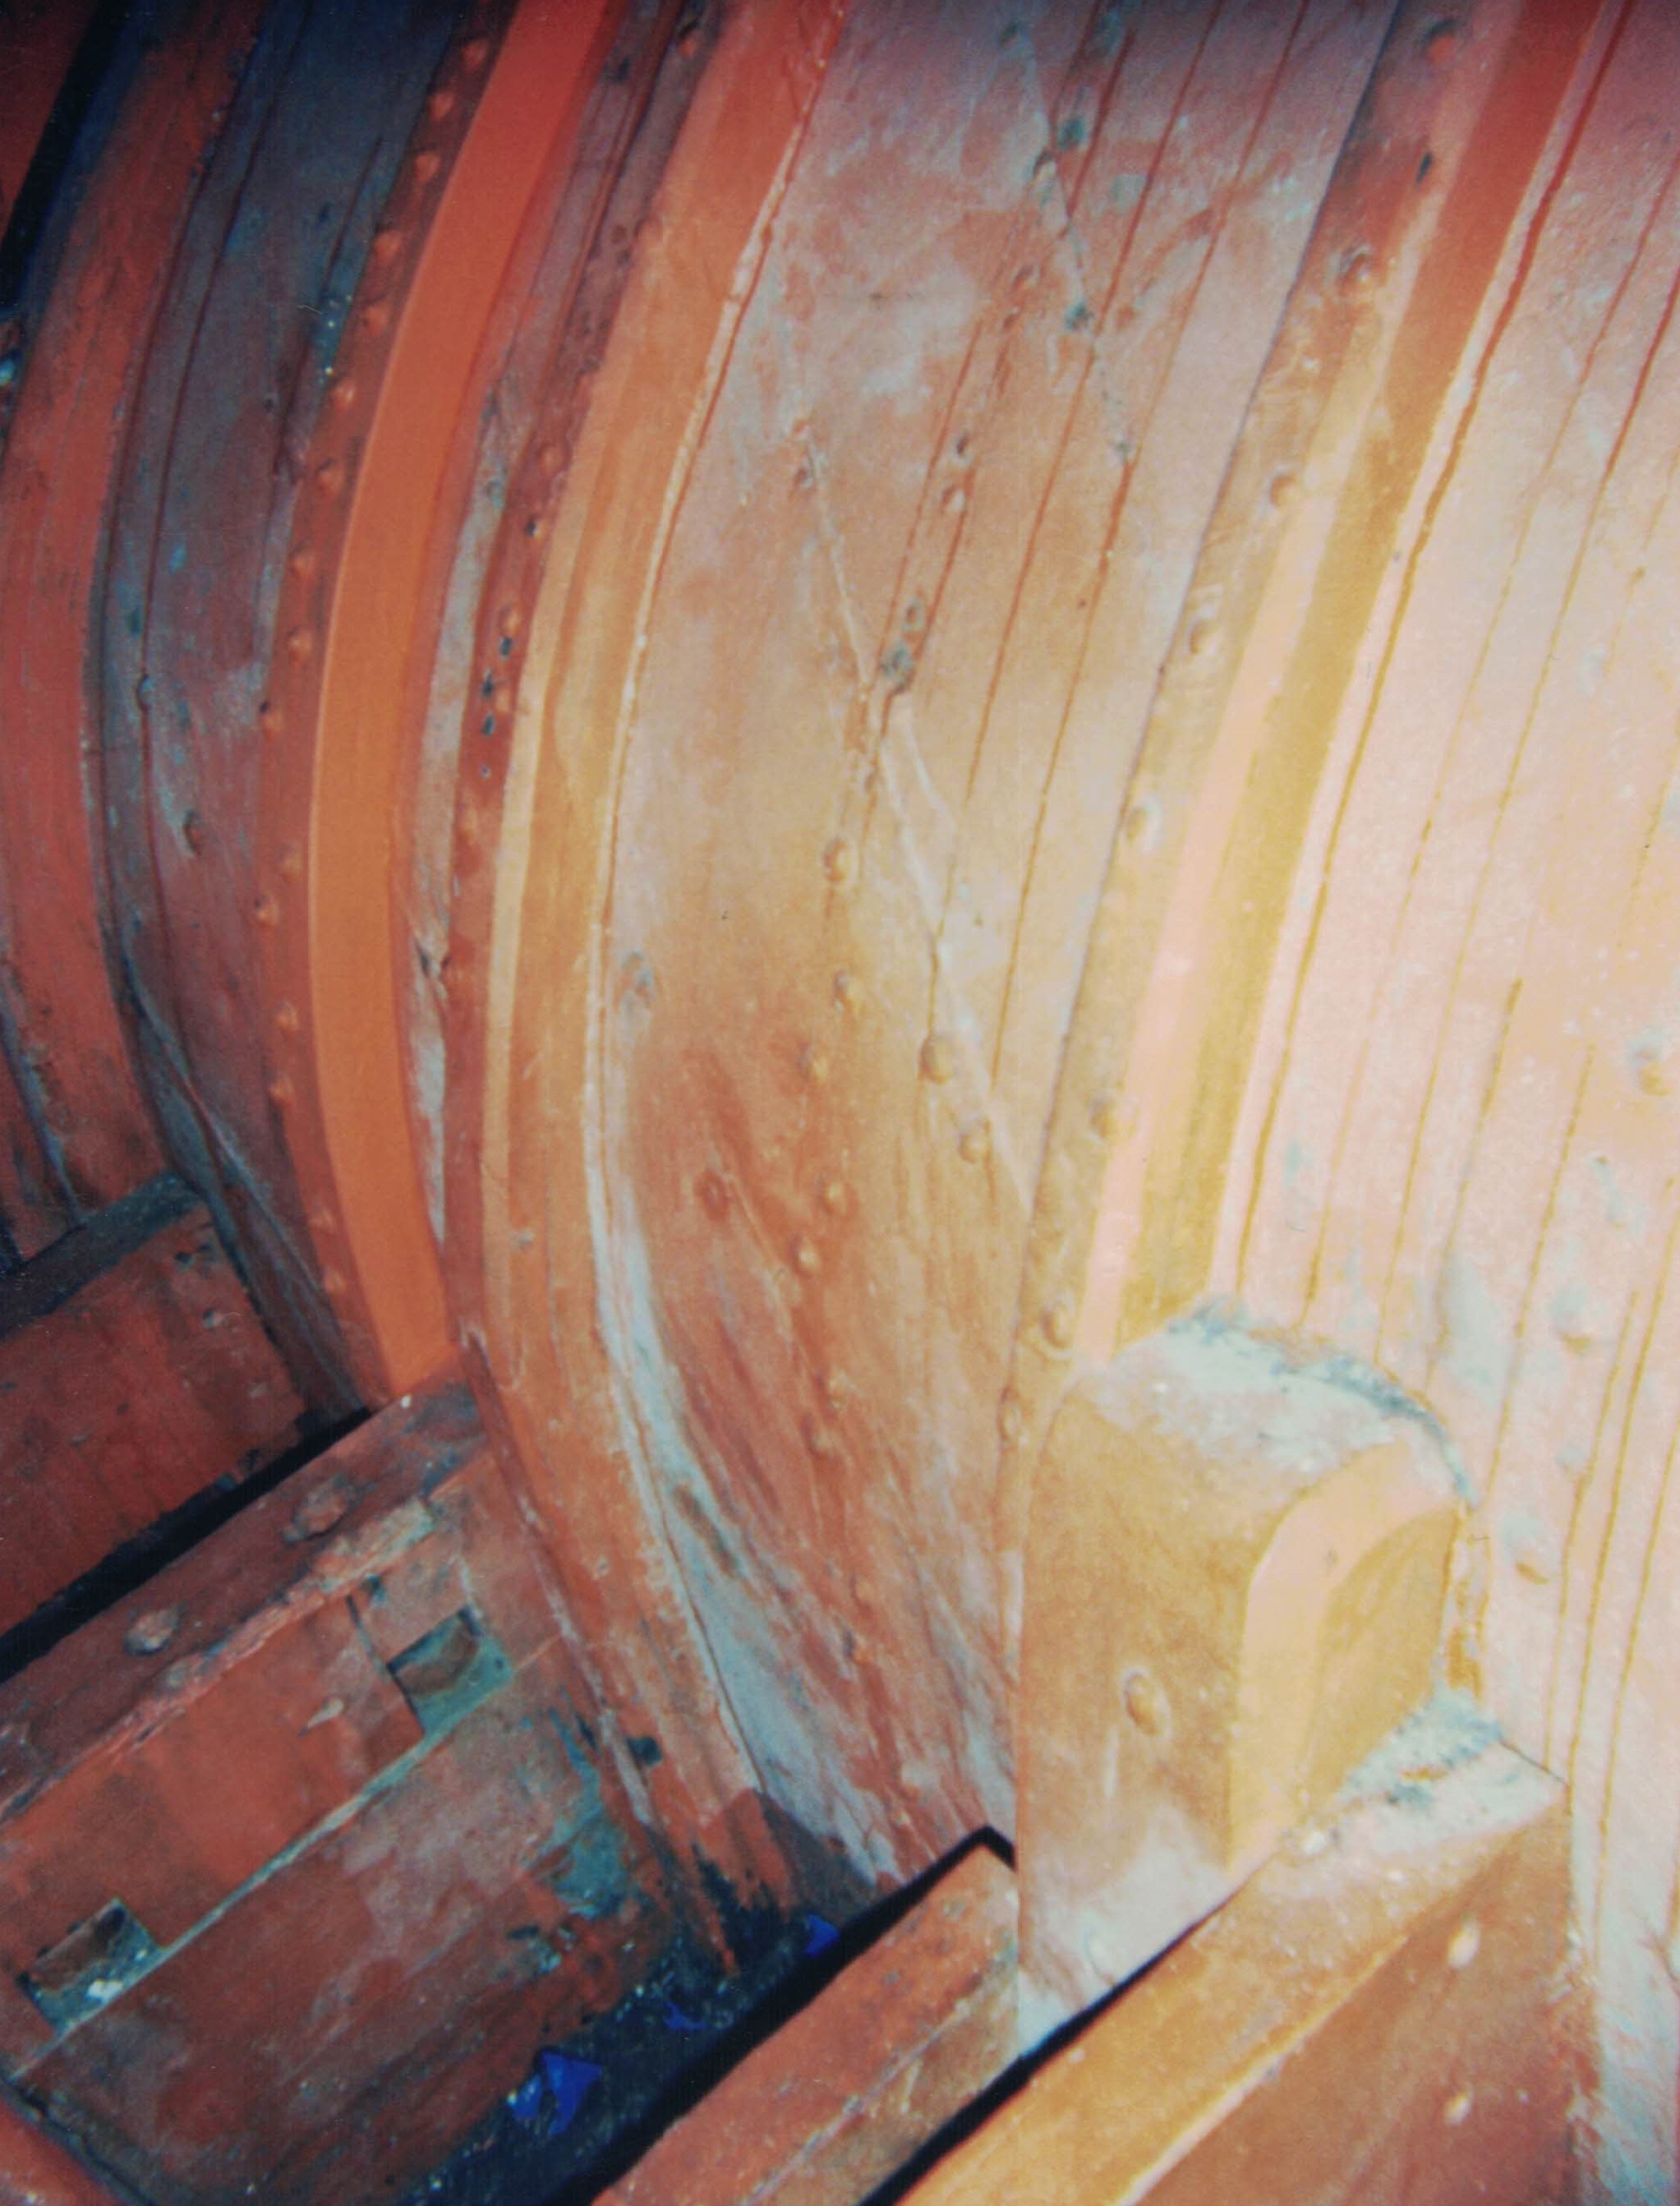
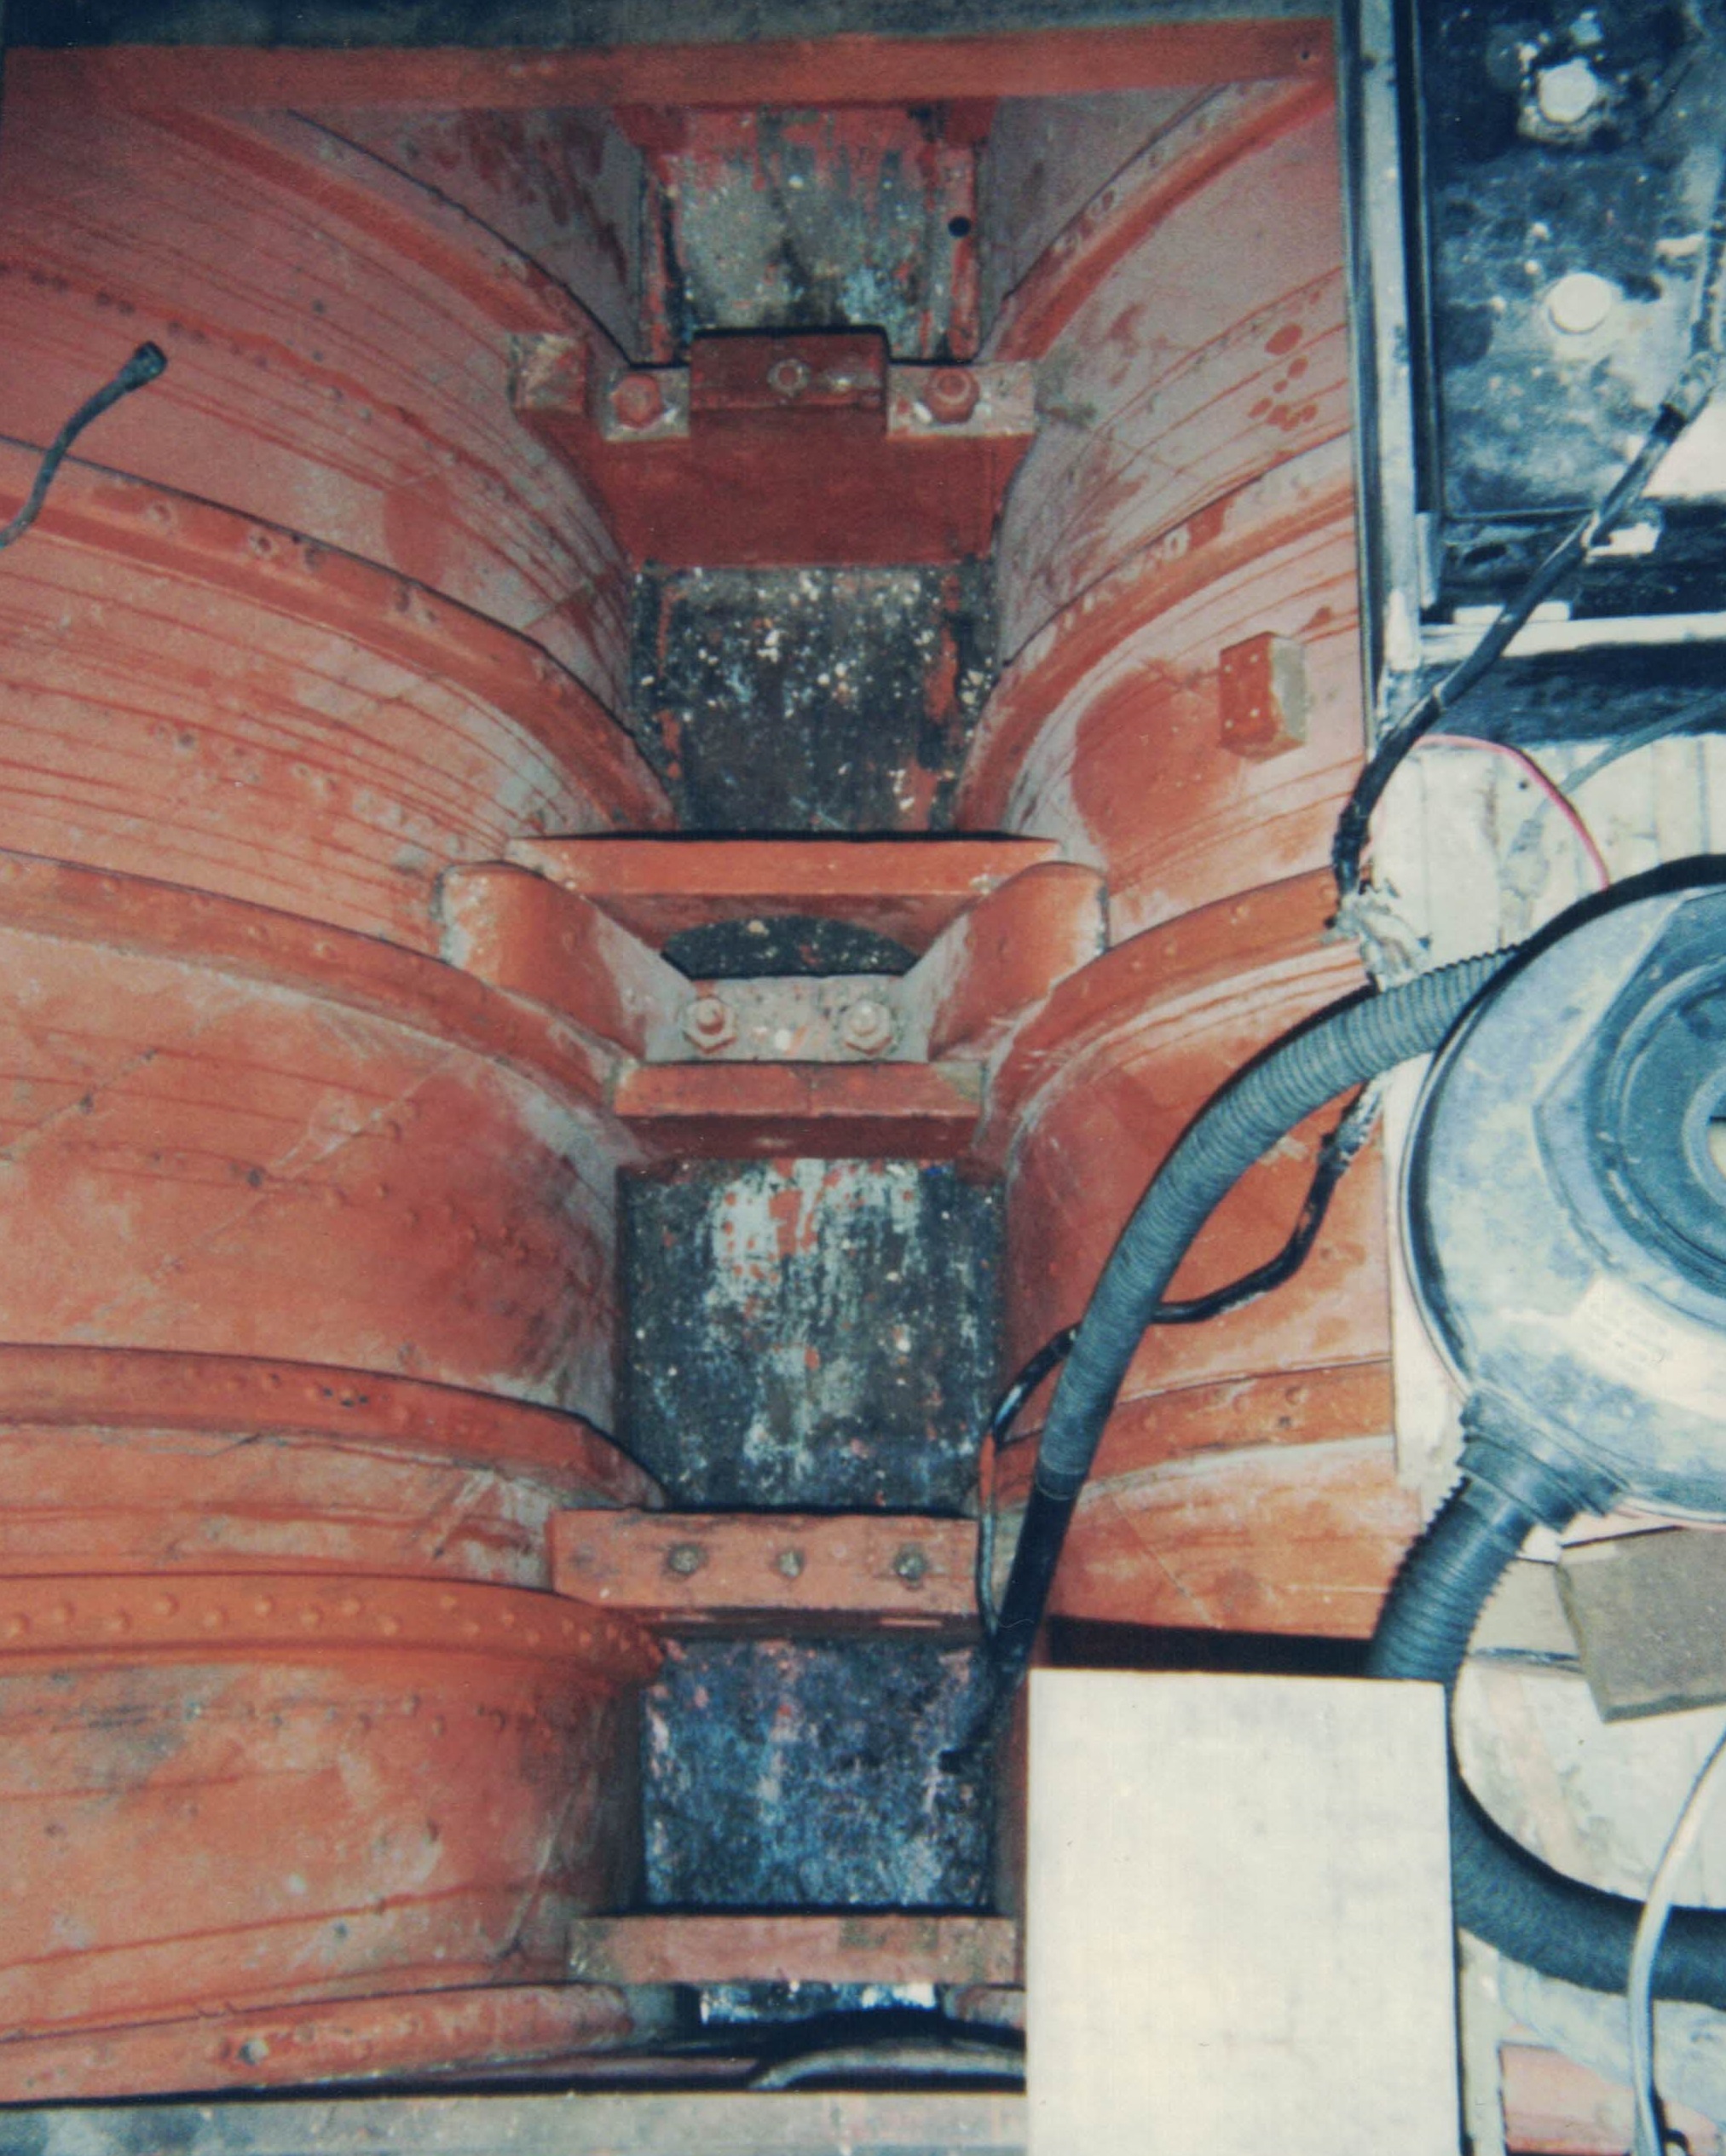
The engine had been removed and the hole that it sat in was a mess. The engine beds for the diesel engine had been welded up out of steel and once been painted with some kind of rust resistant paint. These were basically a flat plate of steel with shelves welded to them for the engine to sit on. They were bolted through the floor timbers forward and aft of the engine. As the engine vibrated, the bolts got loose, the steel plate slid down until it was resting on the planking. As the rust resistant paint failed from the abrasion of sitting on the planks, the steel started to rust into a nice jagged knife-edge. The result was that the thing was trying to saw through the planking of the boat!

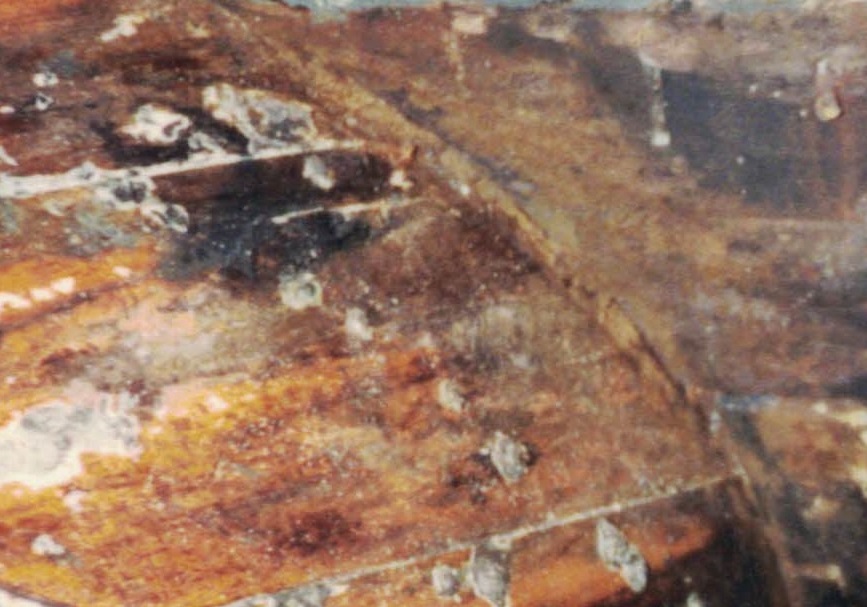
The photos above do not show the damage to the planking with great clarity. You need to remember that this was before digital cameras and I usually had a disposable 35mm camera sitting around for such photos. The down side being that you never knew if you captured what you wanted until after you got the film developed, sometimes months later. I’ve wished more than once during my experience of putting this site together that I could go back and take those photos again. The engine space looks pretty scary in the first photo. It is actually cleaned up pretty well there. For the most part the wood is in good condition but the area where the engine bed was rubbing against the planking was worrisome. Remember the inside layer is only about a half inch thick. The funny thing is that I look at that photo now and it doesn’t look so bad. The damage is probably half way through the inside planking for about 12-inches. This area was painted with fresh red lead paint and new engine beds were made from laminated wood with some carbon fiber thrown in mostly for bragging rights. This essentially was a new floor timber, four inches wide and shaped with a shelf (for lack of a better term) for the engine foot to sit on. This spread out the load of the engine and offered a backing for the interior of the planking.
The engine is due out this winter for gaskets and paint. I guess I will see how it is fairing then. One would think I would have a photo of the new engine beds. But it is one of the missing. At any rate, this is the kind of thing that kept me busy while my heat gun was warming old screws.
(Edit: I found the photo the new engine beds well after initially writing this section. I’ve included it here but will come back to this again in a later post.)
Eventually the entire bilge area was cleared out, with tanks removed. This meant the cabin sole was gone, so one moved about on boards placed across the open bilge. The whole thing was cleaned using a wire wheel on a large angle buffer/grinder. The wire wheel knocked loose paint off without disturbing the wood much. But it made a huge mess. The entire bilge was painted using red lead paint.
The bilge area ended up looking as in the above photos. The rivulets seen running down the paint are actually linseed oil and turpentine, but we are getting well ahead of our story. What happened to that deck? Let’s talk about that in the next segment. It would seem that I wandered off course here, getting into the bilge but this was the nature of the project for a long time. Something to work on in any direction one turned. So I was busy despite waiting on the heat gun.
Next: The Deck is Cleared
Previous: Climate Control